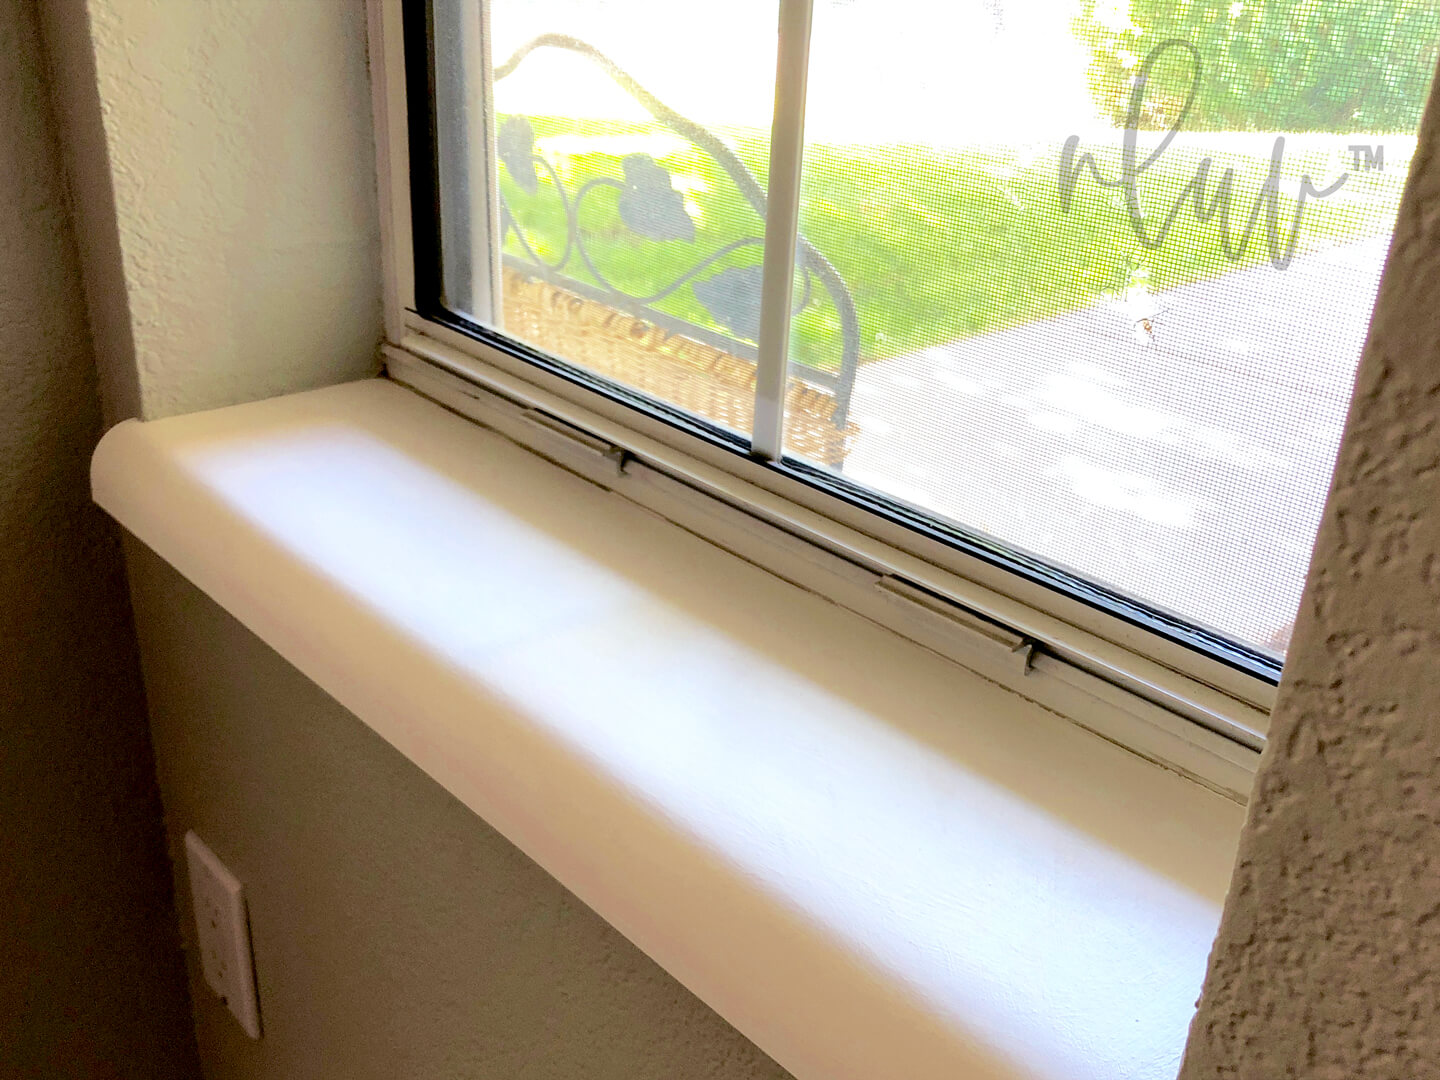
Window sills? When’s the last time you actually looked at your window sills? A window sill is one of those things that doesn’t usually get demo’d, updated, or changed at all. It just seems like whatever they look like when you buy a house, that is the way they stay. The construction of a window sill isn’t one that you just pop out and clip on a new style either. Not like if you wanted to change cabinets in a laundry room or put up some new blinds. Window sills are a bit more part of the wall than a simple switch-out weekend project. Don’t let this bum you out, especially is you hate the ones you have and look at them as the last remaining old feature that your newly refreshed room is stuck with. You can paint inside window sills and love the outcome.
As you finish a room renovation by changing colors, furnishings, or even its architecture, your window sills might not fit in so well anymore. They may be a small detail, but a little effort on them can make all the difference. A simple windowsill revival is just the ticket! Some of you may have formica window sills or a more fancy version of tile or stone. The surface doesn’t matter, especially if you are unhappy with it. Paint can do wonders if applied correctly and refresh this fine detail in your house for years to come. Updating your window sills is more about patience than difficult skill. Your wait times for drying and properly curing will be the most important part of the process. With a solid plan, in a few days you’ll have brand new looking window sills to compliment your room.
Why A Windowsill Revival?
Just like freshening up trim, doors, and even outlet face covers, window sills sit in the same category. They might look white or another ‘matching’ color to your new decor, but after you finish the room, you may notice they are dull or ‘dirty’ looking. A simple coat of paint can blend them into your new decor or a pop of texture or color can pull them out as a new design feature. Save your major effort and renovation dollars for more important projects around the house. A simple DIY project to paint inside window sills will only use a few products to compliment a room without spending the big bucks.
Color Or No Color
Go bold with a color pop!
If you want your window sills to blend in with your new decor, a fresh coat of white or whatever your trim color is may be the perfect finish. I recommend this approach if your existing window sills aren’t the most architecturally ornate or special in any way. This is the technique we used as our window sills are simple formica with nothing decorative about them. Our goal isn’t to draw more attention to them, but instead to just brighten them up so the new window coverings and wall treatments can shine through. We are treating them more like trim in that we want them fresh and bright but not the design focus.
Now, on the other side, if you already have decorative window sills with stone, wood, or tiles, you may really like the construction and texture of them but just not the color. This is where you’ll want to consider adding a new color so they actually become a design element you want noticed. One of my favorite ways to keep the traits of tile and stone but change its appearance is by stenciling a design. This way you can keep the grout line effect while adding an exciting pattern with color to the tile surface themselves. We did this as a project for saving fireplace surround tiles without having to demolish anything. Think of how cool a window sill would be with pizazz added like this? A great idea if you want to have a solid window covering color and then call the attention to the window sill instead.
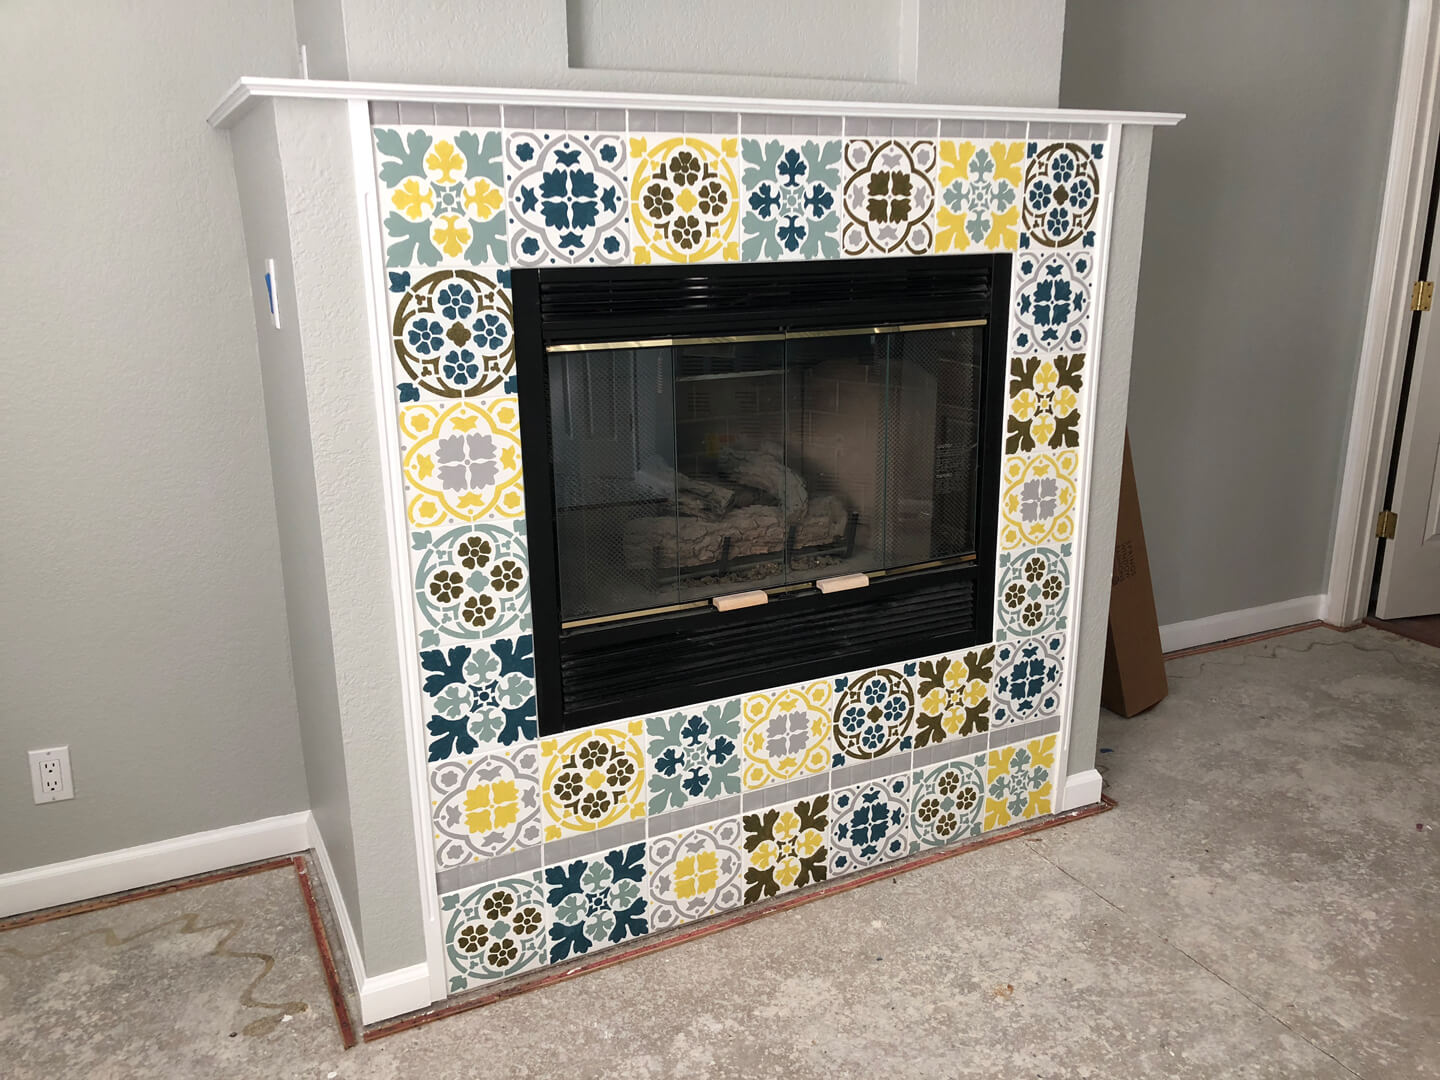
Painted fireplace tiles for a fresh, new look.
Pick The Right Products To Paint Inside Window Sills
Window sill makeovers really are easy. It’s no different than refinishing a countertop, cabinets, or a floor surface. The best part is they are tiny in comparison to other DIY projects, but you still make a big impact in the end. With the proper prep and products, you can use any paint you want. The more important elements are the base coat and the finish coat, not necessarily the color coat.
When it comes to surfaces, it’s hard to know exactly how well paint will adhere especially if the surface gets used. Window sills may get no use or lots of use. Our cat Gus loves to sit on every window sill in the house, so the finish needs to stand up to walking, jumping, and potentially scratching. In almost every paint project we do, an etching agent is used to start things off. This gives the surface, especially ones we aren’t sure about, a bit more ‘tooth’ for paint to grab onto when we start painting. I recommend using an etching agent for any surface you are not 100% sure about its adhesion rate. That was especially the case when we refinished the deer antler chandelier. There’s nothing worse than going through the whole paint process only to have the first bump cause a nasty scratch.
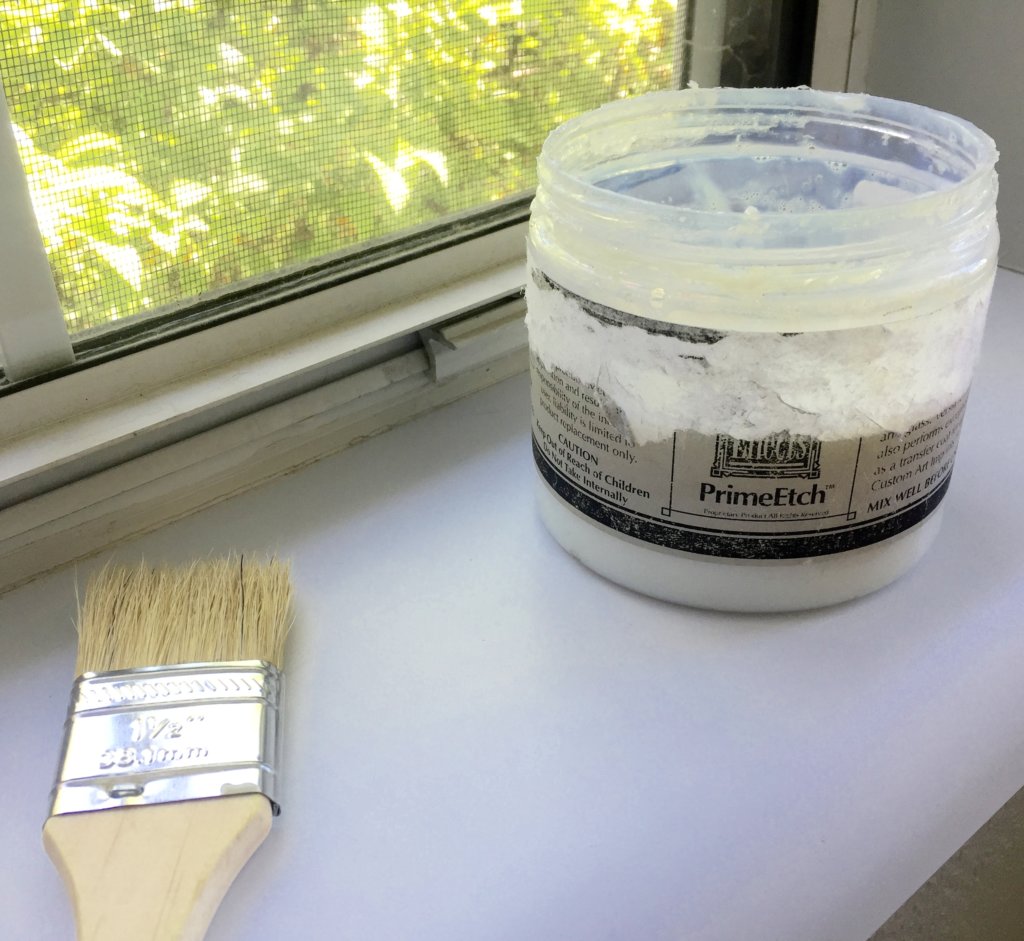
An etching agent can help adhesion on hard-to-paint or unknown surfaces.
Step 1: Cleaning
Before you do anything with a brush or paint, a good scrubbing is in order! Always start off with thoroughly cleaning the surface to be painted. Window sills are dirty especially if you open windows or have paws running across them, so get them as clean as possible. My go to product is Krud Kutter. You can use it at full strength for exceptionally greasy projects or dilute for less extreme conditions. Spray on the Krud Kutter and wait a little so it can start breaking down any grease and residue. Then start wiping it off and repeat until you have a squeaky clean surface. This step will help increase the success factor in durability for the long haul.
Step 2: Remove Old Caulking
Now it’s time to carefully inspect the edges of the window sill. Do you have old caulking that’s lining the window sill to the window and walls? If so, I recommend removing it before any further work is done. Our windows had old, cracking discolored caulking surrounding the window sills and our intention was not to just paint over it. We took the extra time to carefully (not gauging the walls) remove the old caulking, knowing that we would put a fresh caulk line around the window sills as the last step in the project.
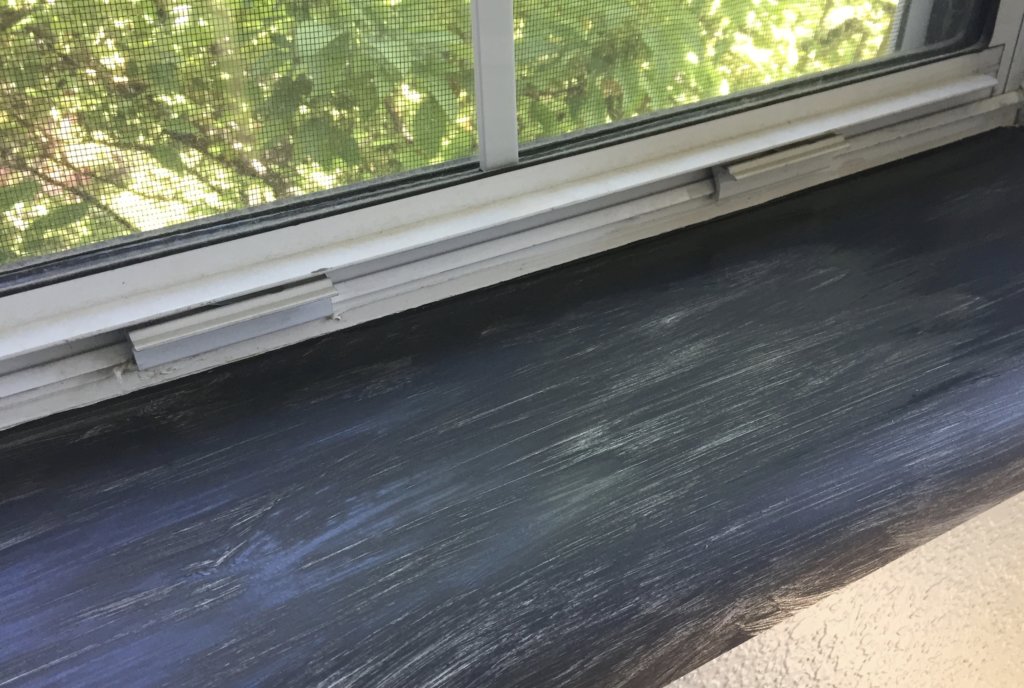
Step 3: Etching
After you’ve scrubbed the window sill surface clean and removed any old caulking, it’s time to add the etching agent. Our go-to product is Faux Effects® PrimeEtch™. Apply one smooth, even coat to the surface and let fully dry, which means waiting overnight till the next day. No need to dilute or mix with anything. Just straight out of the jar and onto the window sill surface. It will dry clear and a little shiny so you’ll know where you’ve put it. You’ll also be able to feel the somewhat tacky and rubbery texture it leaves behind which is exactly what we need for our formica window sills.
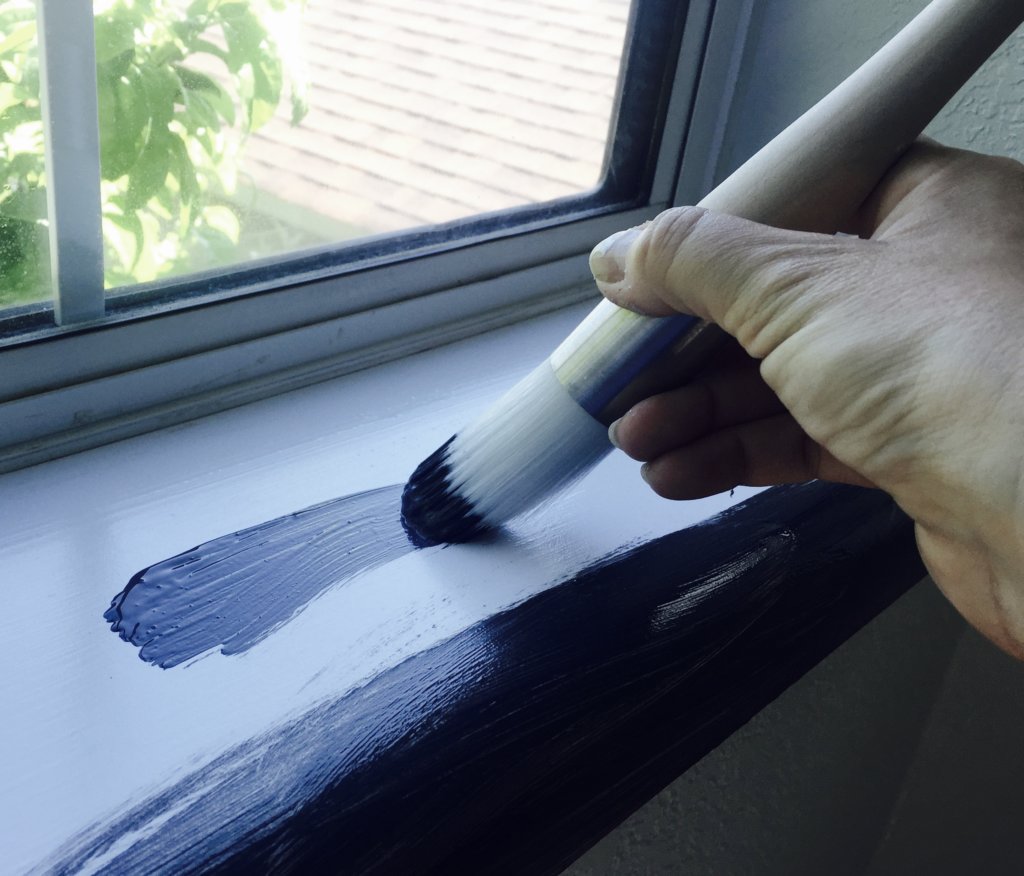
Step 4: Let’s Paint
Pick a paint – any paint. Honestly… pick any paint you want. The best part of this is if you are wanting your window sills to just melt into your room and be refreshed but not really noticeable, use your trim paint or even your wall paint. Many DIYers love chalk paint due to its easy on application and overall look. If that’s the case for you, get out that chalk paint. Another option is if you wanted to add a little texture to a smooth window sill, like our formica ones, consider using a textured paint that has sand or crushed shells in it. This will create a completely different feel and look and might be exactly what your room needs.
Match It
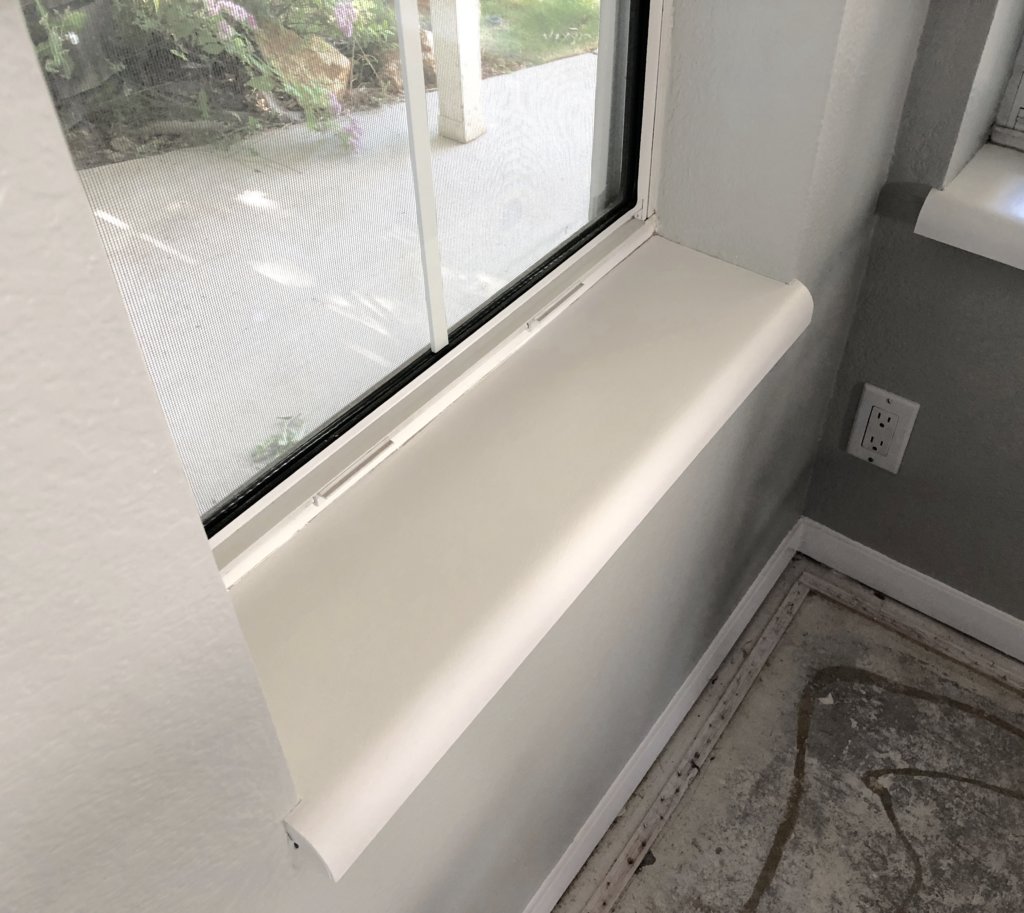
When you decide to paint inside window sills the same especially color as they were, you will have many less coats than someone completely changing the color scheme. Our window sills went from sort of white to really white, so we didn’t need any additionally primer or extra coats of paint. After the etching layer fully cured overnight, we then only needed two coats of white paint to create a solid new look.
Go Bold
If bold is in your playbook, consider a tinted primer after etching to get you closer to your final color and help make a smoother paint finish. You still may need three coats of the new color to fully cover the old window sill, but without the tinted primer layer, that number could go even higher. I never like to have more than three coats of paint on a surface as the thicker the paint gets, the higher likelihood of it getting scratched seems to happen. I’d rather even the color out more with the primer than with the paint itself. I say this only from personal trial and error. So, if you haven’t had my bad luck with additional paint coats, do what works best for you.
Be Patient
Regardless if you are staying the same color or going bold, don’t rush the painting cycle. If you rush and paint additional coats on top of paint layers that haven’t fully cured, you only increase your chance of scratches in the end. And when I say fully cured, I don’t mean dry to the touch. Some paint can dry very quick to the touch, in like 30 minutes. But that is NOT fully cured or ready to take on another layer of paint. Follow the paint guidelines carefully. If the paint you chose ways it takes four hours or even over night to cure, follow the recommendations. This is why I said that painting window sills can have more patience than skill required. You may have days of dry time to combat depending on your paint choice.
Apply thin coats till your color is deep & provides full coverage.
Step 5: Final Coat Of Sealing
If you used chalk paint or know your window sills will take a beating, don’t forget to properly seal. I prefer a heavy-duty furniture style sealer to finish things off when I paint inside window sills. Even if you don’t think anything or anyone will touch your newly painted window sills, that’s probably not the case. An open window let’s everything and anything outside to come on in and sit right on the sill. And don’t forget about those paw prints and the occasional drink glass.
Many chalk painters out there love pairing their finished project with wax. If you insist on using wax, just make sure you apply enough coats and I then recommend buffing to give a shiny finish which is easy to wipe clean when needed. You will probably need to re-wax every so often to keep the barrier up which is why I prefer the furniture sealer instead. I am one of those people that enjoys a project once but doesn’t want to have to keep coming back every year to touch things up.
Step 6: Re-caulk The Edges
If you remember at the beginning, we decided to remove all the old, cracked caulking from around the window sill. Now that all the painting and sealing is finished and fully cured, it’s time for the final step. To finish it all off, caulk the edges around the window and walls. Choose a high quality caulk that will take the abuse of a window sill and the changing temperatures and moisture level of being against a window. The caulk aisle at your local DIY store can be a bit overwhelming as there are literally walls of different caulk to choose from. Don’t be embarrassed or shy to ask for advice. It’s better to have a quick conversation with an expert than choosing the wrong caulk to only remove it again.
Also consider all the different colors caulk comes in. Pick what will go best with your color scheme. Caulking isn’t a design feature you want to call lots of attention to so pick something that blends well either with the window sill color or the wall color it’s up against. Don’t forget how you plan to make it the perfect smooth line too. Some of you out there are caulking masters and can lay a bead of caulk against a joint and smooth it perfectly with your finger tip. Others try to do this and end of with a mess everywhere. Be honest which type of person you are. There are simple plastic tools you can get to make the perfect edge if your finger just isn’t doing it. With the new fresh caulk in place, that’s it! Your paint inside window sills project is complete.
Subtle But Striking
Fresh new paint for a glowing touch!
The power of paint really doesn’t get the credit it deserves. A fresh window sill will light up the room without anyone knowing what you’ve even done. It is an easy project that rewards big. For our paint inside window sills project, the total time from start to finish spanned four days. Day 1 was cleaning, removing old caulking, and etching. Then Day 2 was for painting. Day 3 we applied the sealer. And finally Day 4 was re-caulking.
When you plan out big projects or just look around for quick wins for a fast pick-me-up, make sure the little things like trim, doors, air vents, light switches, and of course window sills make the list. Not every impactful project has to take months to complete and $10,000 to finish. Even something as simple as new window coverings or handle pulls in your kitchen can completely change the way it feels.
These little touches can bring an entire room together and show your attention to detail for a complete design plan (without having to redesign everything). And the best part is when people notice something is different and how great your place looks but they just can’t put their finger on exactly what you did. Tell them if you want… or keep it a secret and let them think you are their super crafty neighbor that’s like HGTV living next door.
Don’t sweat the small stuff. Take your space on in mini renovation projects and revolutionize your surroundings one square inch at a time. Want more craft ideas, craft projects and easy DIY redos? Sign up for our nluv Craft Club for special promotions, coupons, and lots of fresh ideas.