I must admit… my first thought when we stepped into our house was “Get RID of this thing!” What I was looking at was a dusty, blah-colored, hideous deer antler chandelier. In no way was this rustic lighting our style so it would have to go. But, I didn’t really mean that. I was having an emotional reaction to a ‘diamond-in-the-ruff’ that deserved more creativity and a chance to shine! The nluv Studio spirit isn’t to throw away something as useful as perfectly good chandeliers, albeit a deer antler chandelier. Its overwhelmingly western decor feel didn’t fit the room, but it could with a little creativity and TLC. An intervention is in order!
The Loft Lighting

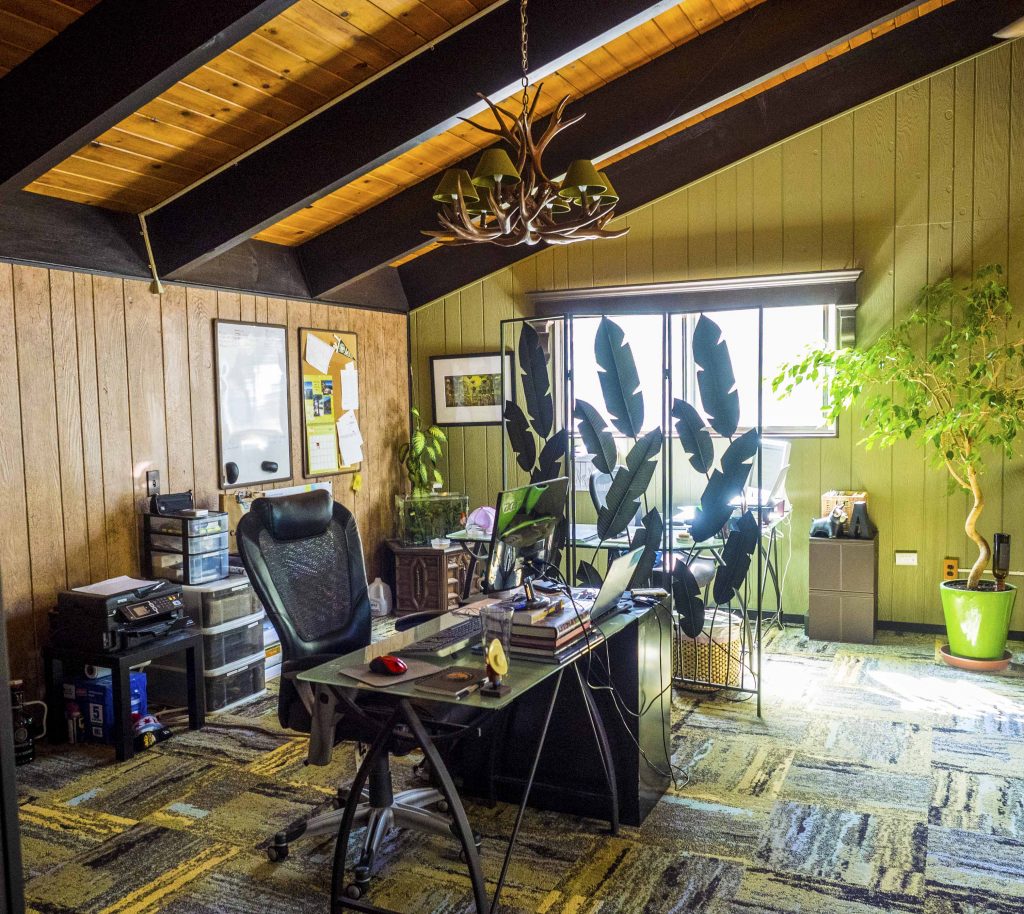
Original un-renovated office loft
You’ve heard me talk about the large office loft space that sits on the 2nd floor of our Tahoe home. The beautiful exposed beam ceilings and skylights allow us to look out across the trees and take in the gorgeous landscape surrounding us. When we first bought our house, the loft space had dark reddish-brown shag carpeting, worn-out throw rugs, white-washed wood walls, a crazy parquet wood floor inset, and a deer antler chandelier in the perfect 70’s color palette. Yikes!
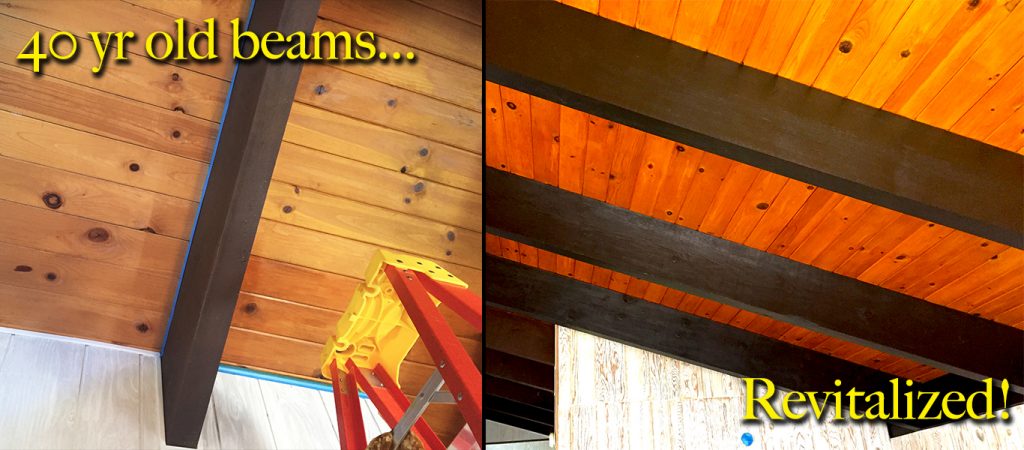
Top To Bottom
We remedied the carpet situation over a few prior weekends. In a nutshell, we leveled the floor, installed cool new FLOR® carpet tiles, and finished off the room with baseboards and transitions. Things were looking up… until you actually looked up!
The ceilings, though beautiful in their own woodsy lodge-way, were dry and tired. It had been 40 years since they had been stained and were in need of a serious pick-me-up. Staining vaulted wood ceilings is a tough back-breaking job and will take a long time to complete. It took me about three months to finish just the upstairs loft area with two coats on all surfaces. But, regardless of the painstaking and unfun nature of that project, the result is undeniably amazing! Revitalized wood on the ceilings and new flooring was bringing this room back to life.
 The old deer antler chandelier hangs in the middle of the loft and is the only light source. At this particular time, I didn’t have an alternative and we needed to have some sort of light. The house is very rustic as any Tahoe home should be. I knew in my heart this antler lighting belonged in the room, but just as everything else was getting a facelift, it needed one too.
An Antler Intervention
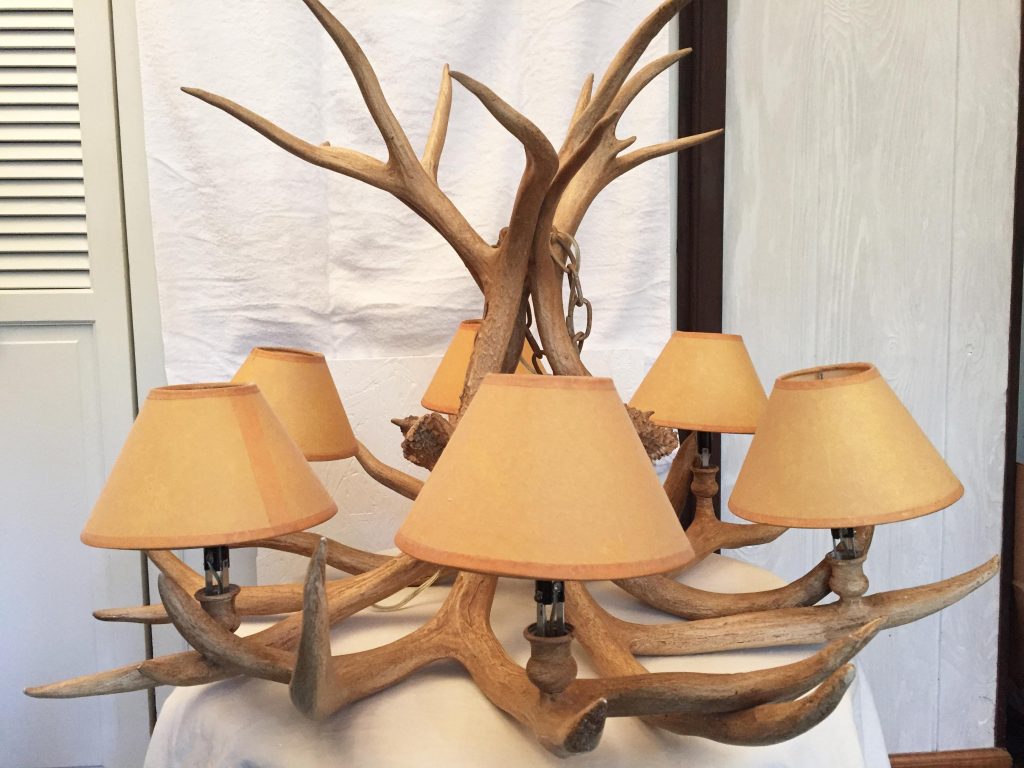
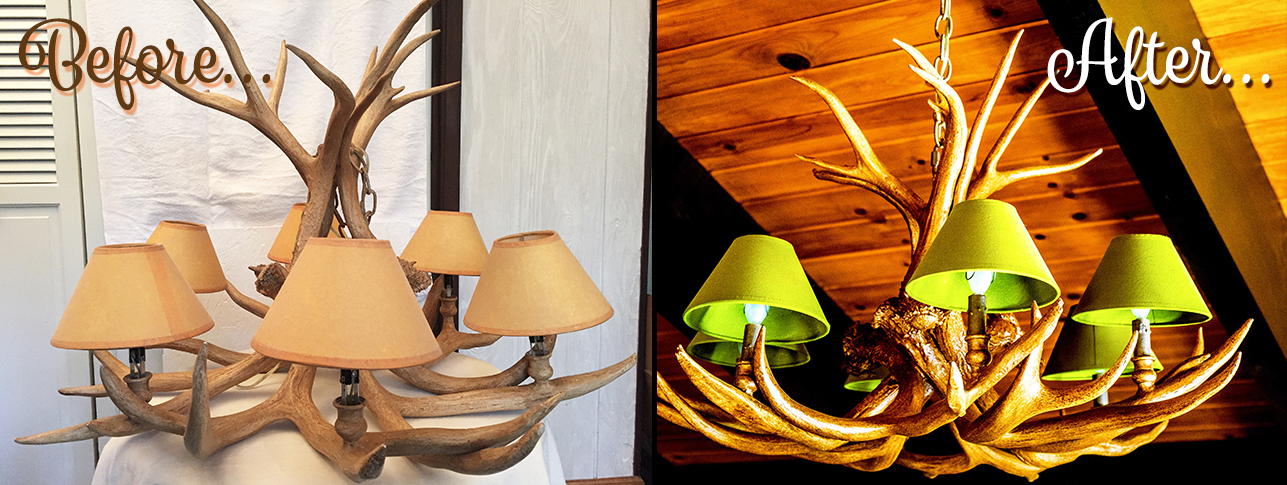
Faded, original chandelier
I’m pretty sure these antlers were much more vibrant in the wild when they adorned a beautiful buck. Nature may have shed and thrown them away, but they were now in our house and deserved a makeover. The color was drab and now that the floor and ceiling are so vibrant, the chandelier looked even worse and almost disappeared in the room even though its quite large size. I intended to keep the overall look of the antlers so what I decided to do is restore them to a deeper, richer hue and kick up the little lamp shades with some color. The design was set: darken the antlers and glaze for a nice sheen and then paint the lamp shades a mossy green for a natural look and to pick up color from the carpet.
Step-By-Step Instructions
Clean and Etch
Clean & clear base coat as prep
- Clean, Clean Clean! If you skip this step, your whole project and all your effort will be completely wasted… and ruined. No one successfully paints dirty, greasy kitchen cabinets so antler chandeliers are no different. With mild soap and water, wash the antlers and remove ALL dust and grime. If the antlers still feel sticky at all, mineral spirits or denatured alcohol may help remove the tough residue. You could also try TSP or a TSP substitute. Be gentle and test a spot to make sure you don’t harm the surface.
- After a thorough cleaning, my antlers still had a sheen to them. Not being exactly sure what the top coat is, I decided to use a clear etching product to help create a bonding layer on the antlers for the stain and glaze to grab onto. One coat will do to add a little ‘tooth’ to the surface.
- The base color of the antlers is a nice neutral color, so I’m keeping it. To prepare the surface for my glaze, one coat of clear base paint is the perfect layer to kick things off.
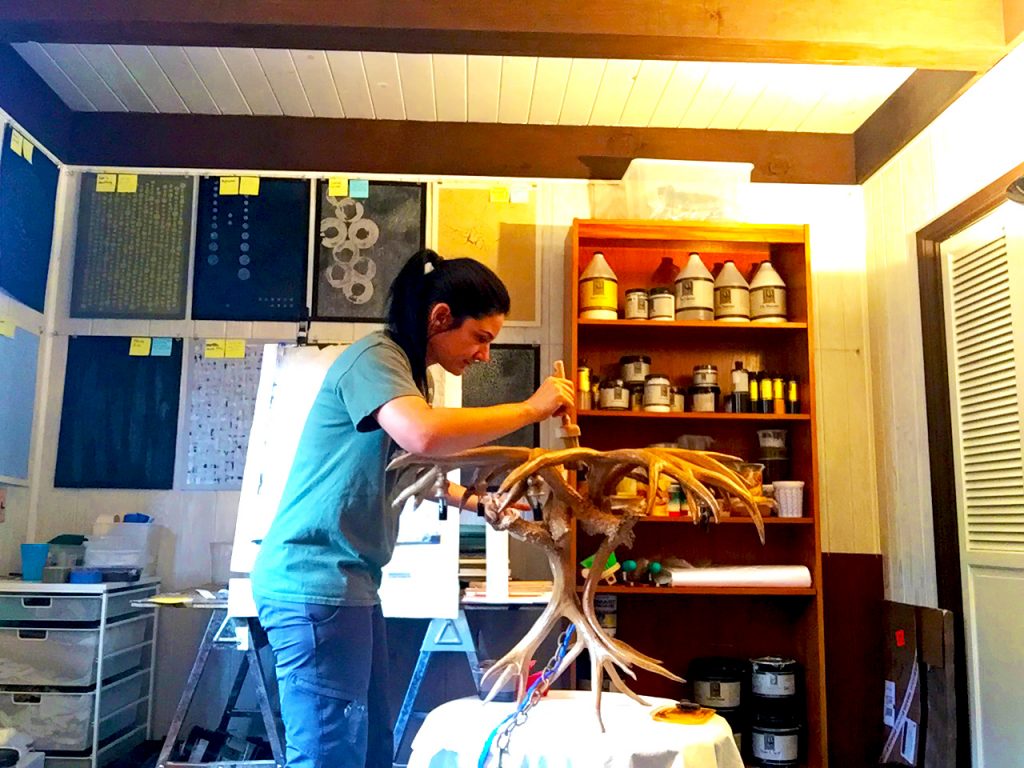
1st Glaze
- I love to mix stains into my glaze. It creates such a rich look that still allows the details of the antler to show through and is just what these antlers need. With left over stain from the ceiling, I used a little American Walnut stain mixed with Antique Mahogany colorant. Not every step requires fancy tools or equipment either. A simple, inexpensive chip brush is great for getting into all the little nooks and crannies on the antlers.
- After letting the glaze dry about 25% on the antlers, I used my Hog Stippler (brush) to move the glaze around a little and even things out. I then came back again and stippled straight onto the antlers with more pressure to get the perfect look of smooth color but with a little roughing-up.
2nd Glaze
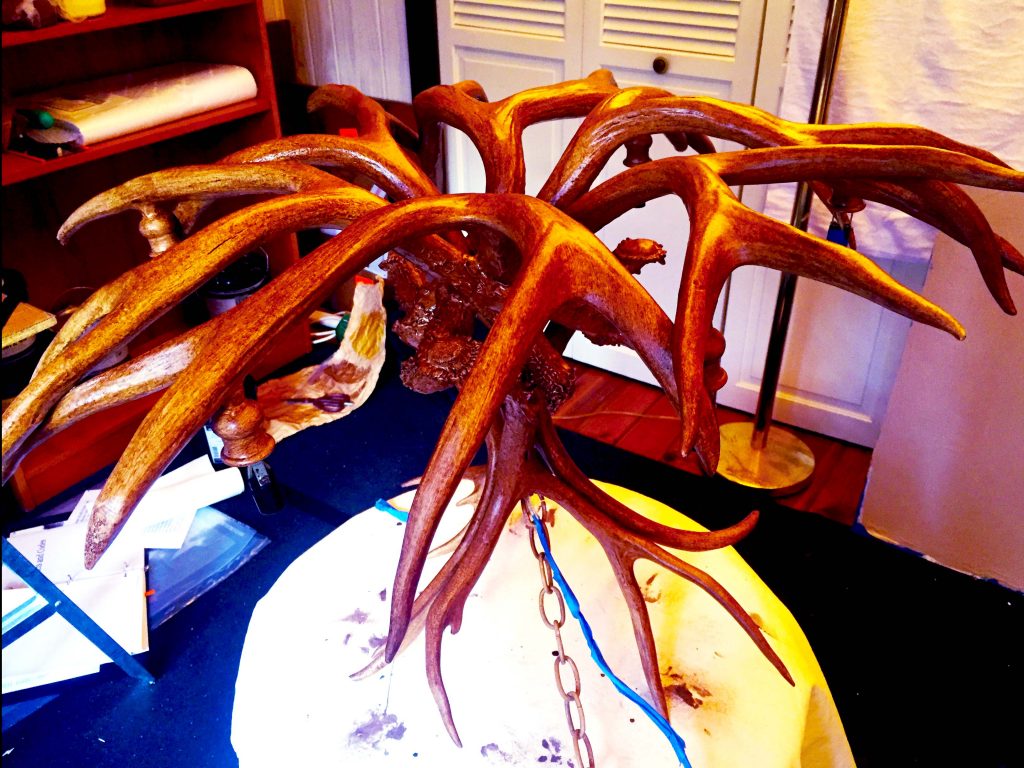
2nd coat of glaze really kicks up the color
- The look of the glaze is perfect but still needs to be darker. The chandelier has some competition now in the room with the restored and vibrant ceiling, so it’s important the the antlers don’t just disappear again once hung up. I mixed up another glaze but with twice the color concentration and added a little black. This layer is applied with a foam brush to really push into all the grooves with a thicker application and less brush strokes.
- For this round after the foam brush application layer, I am using my Badger brush to feather out the darker glaze for the perfect finish. I love my Badger brush! It lets you move the glaze around without wiping it off or creating bare spots. The glaze also acts like a sealer, so no additional sealer needed on this project.
Don’t Forget the Extras
- After all the work on restoring the antlers, the very noticeable hanging chain must be addressed. Spray paint the chain and the plate cover. It’s fast and easy but makes a huge impact overall. I chose a dark brown stone flecked color for a natural finish. A couple coats did it but be careful to cover the antlers so you don’t accidentally spray them! I used a yard waste bag to cover the chandelier and then just put the bag in a trash can to use later.
- The last piece to the project is the little shades. The lamp shades definitely need some attention as their color no longer works with the revitalized antlers. Prime and then paint with a mossy-green. I painted 2 coats ensuring full coverage and no streaks! Use latex paint you have left over around the house or any craft paint.
Lights, Camera, Action!
Don’t rush through all the steps and try to hang up your revitalized deer antler chandelier too early! Respecting dry times between steps is imperative. If you paint over a wet layer, it will never fully dry underneath and cause failure spots down the road. Make sure everything is dry and ready to be on display.
The last step in the process is to hang, screw in the light bulbs, and ‘let there be light’! CAREFULLY install your chandelier! Now is not the time to rush and scrape or scratch your newly refurbished chandelier. Turn off the power in the breaker box before you start connecting wires. That’s always a good idea when working with electricity. You shouldn’t forget this step as you should have done the same power shut-off when you took the chandelier down in the first place!
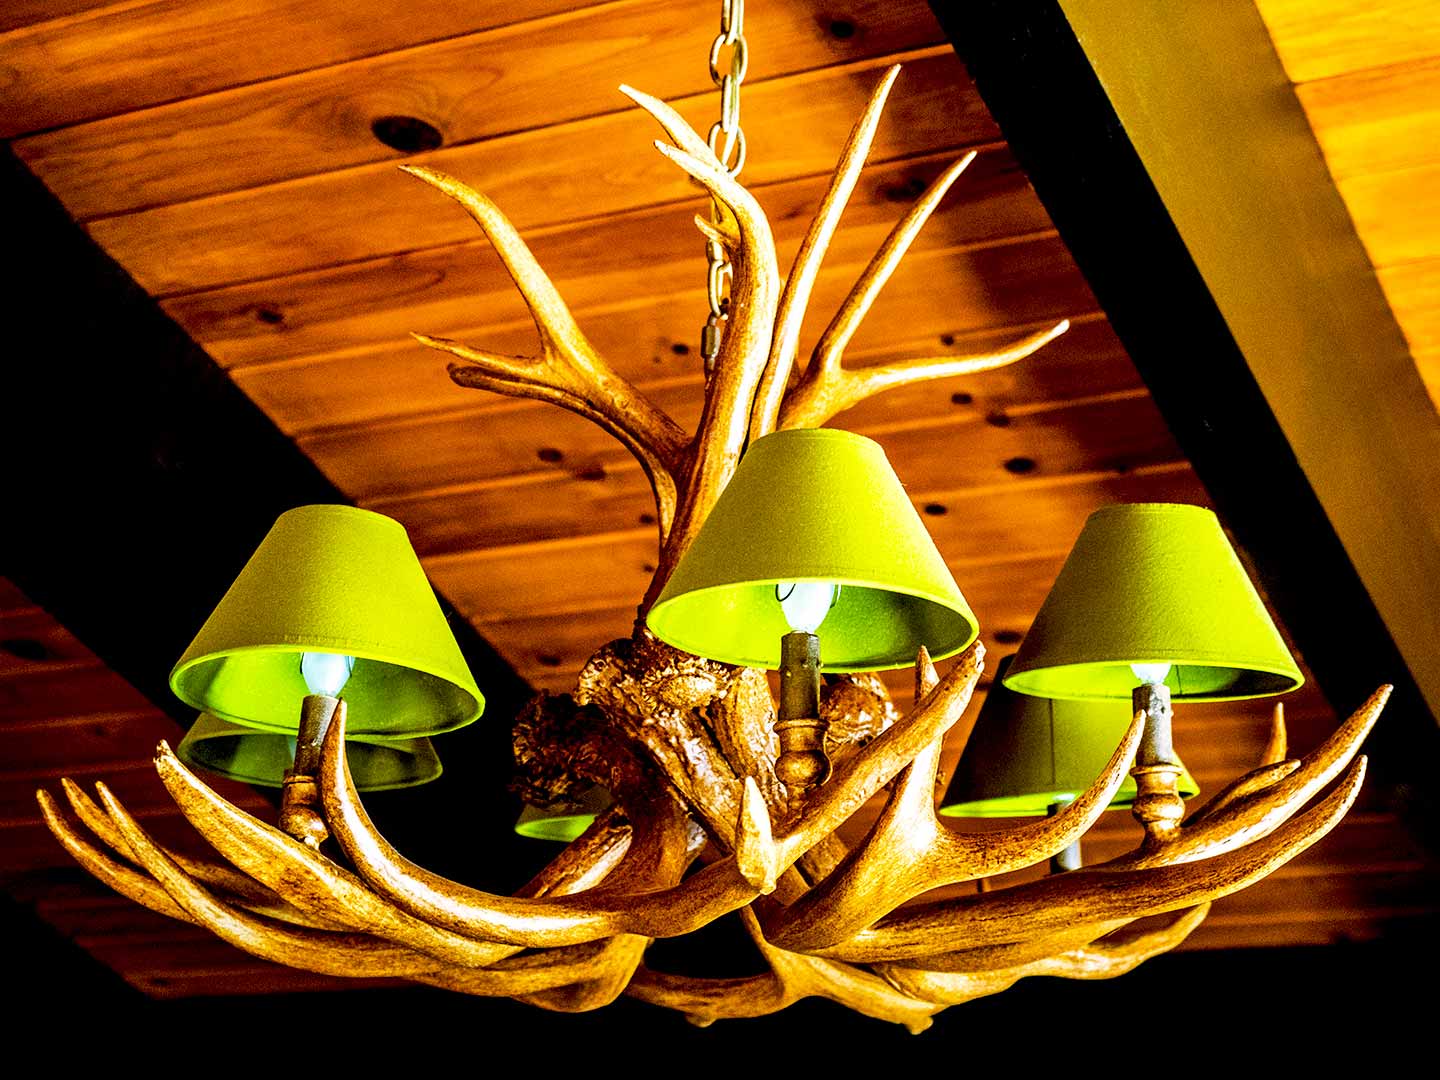
Completed office loft w/ chandelier
With the deer antler chandelier safely hung, we turned on the power and flipped the light switch. WOW! The deep, rich color of the antlers with the lamp shades are a perfect compliment to the room. With the room lit up, it was time to load in all the furniture.
Note: After a few days of working in our newly renovated loft, the room still felt dark overall. Originally we had regular bulbs in the chandelier, but they just didn’t put out enough light for such a large space. Although more expensive, LED chandelier bulbs were a huge improvement on illuminating the room, as well as eco-friendly and longer lasting. This project was a lot of work to then skimp on the light bulbs and still have no light. Consider your light bulb choice carefully as the extra money for LED may be well worth the investment.
I saw the original antler chandelier and then the revitalized one…. OMG….looks brand new yet original. The beams and wood ceiling turned out so rich looking. Great job nluv studio….hard work paid off. Keep up the great jobs….your tutorial was the best….took the scary out and put the fun and satisfaction in.