When you ask people about the process of staining wood, they seem to either love it or hate it & others are just plain afraid of it! No one ever answers “Yeah, staining is cool so I don’t mind doing it…” I’m obviously biased in that I love working with finishes & different kinds of wood, but to most people, the idea of staining or even painting for that matter, is NOT considered a fun, rewarding project. My hope is to coax you over to the ‘love’ stain side of the argument. But, not all stains are created equal so I want to talk to you specifically about water-based stains. When I met a product named Stain & Seal™, it revolutionized my thoughts about staining! Hopefully it opens your eyes to new ideas as well. Let’s dive in!
Don’t neglect the ceiling!
Our home in Lake Tahoe is blessed with beautiful vaulted, exposed tongue & groove ceilings and solid beams. Nothing makes you feel ‘one’ with the mountains like an exposed wood ceiling! The center slats are caramel in color while the beams are dark & prominent. Looking high up above us, we could feel the craftsmanship and love put into every board.
At over 40 years old, the house is solid in construction, but not glorious in its colors & finishes. Though the ceilings are the crown jewel of the home, they looked worn and dry as if no one had pampered them since they were first installed. And let’s be honest… who wants to dangle 30 ft. in the air refinishing a ceiling? It’s not an appealing idea (not even to me). The end result though will blow you away & make you forget how terrible it was to finish!
Oil & water aren’t friends
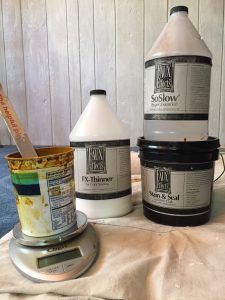
Mix things up for the perfect formula
I have always disliked oil based stains mainly for the cleanup, dry time and smell. Let me clearly state they produce beautiful finishes. Personally, I yearn for projects that are simple to clean up in the sink, smell good when I’m done & dry when I want them to. I first encountered Stain & Seal™ a few years back and have never used another stain since! It was simple to mix, easy to clean up & packed a wallop of color, staining and sealing in one step. It was the perfect product for our ceiling rehab.
Staining a ceiling is not normally an easy weekend project. It took us about two months to finish the back half of the house and the main living area is still waiting for its makeover. It is much more time consuming to stand on a ladder the entire time, looking up and contorted at uncomfortable positions with your shoulders screaming for a break. And remember with staining, there are several steps to consider that regular painting doesn’t require. Before we go into the details on the ceiling project, let’s take a moment to talk about the product and why we used it.
The wonder of water-based stains
There are lots of products on the market, but once you get comfortable with one, it seems to stick. I’ve honed in my use of Stain & Seal™ and have made it one of my go-to products. Stain & Seal™ is a water-based staining material that is gel-like in consistency and concentrated in color. For max color, take it straight out of the bucket and simply rub into the wood, wait a few minutes and then wipe off.

Stain & Seal™ is mixed right in the glaze for a custom color
The best part is that it stains and seals the wood in one step. If you want a thinner substance, you can add FX Thinner™ as well as SoSlow™ to stretch out dry time. Living in a dry climate or just wanting a more relaxing project, slowing down the dry time can make things much more enjoyable! Take the worry of lap lines away!
Stain & Seal™ also comes in lots of colors and even metallics so you should find something you like. It’s environmentally friendly, non-hazardous, non-flammable and actually smells nice. And as a bonus, this product is also versatile enough to use in glazes. Just add Stain & Seal™ to your glaze, such as Faux Creme® Clear and create a custom glazing medium for any project, not just wood! Do you remember the Antler Chandelier? Yup, you guessed it… I used Stain & Seal™ in the glaze to revive the color!
Step-by-step ceiling staining
Equipment & Prep
-
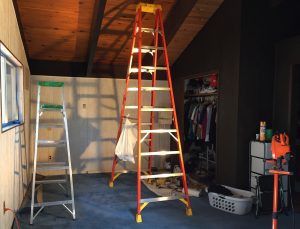
Right equipment = Success
Make sure you have the right equipment for staining your ceiling. I’m talking about ladders, scaffolding and lighting. Pick what you are comfortable using and what’s safest for your job. I used a combination of ladders: 8′ A-frame, 12′ A-frame and a 20′ extension ladder as well as construction lights.
- Do a light sanding and a gentle wet rag wipe-down to get your wood ready for the new stain. I know the thought of making more passes across the ceiling is not appealing, but don’t skip this step. You really need to ensure the wood is sanded and clean for the best staining outcome.
Time to Stain
- After the boards & beams dry from your cleaning, it’s time to mix up the stain. For our Tahoe-mountain climate, the mix is as follows:
- 75% Stain & Seal™
- 10% SoSlow™
- 15% FX Thinner™
- I did not tape for this ceiling project. I carefully applied the stain at the edges and wiped without making a mess. If you don’t feel confident in doing that, make sure you tape because stain won’t just wipe completely off like paint or glazes will. If you stain it, you stain it. That’s the whole point!
-
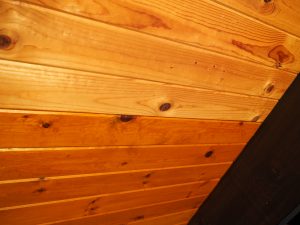
The stain is soaking in!
Use a chip brush and paint on the stain, not too thick but enough to smoothly cover the surface. Continue to apply the stain mixture until the first board looks like it is just about to start drying. I chose to stain the lighter caramel color first on the tongue & groove boards and finish with the dark beams. This way if the lighter stain got on the darker beams, I would never know when I finished with the dark stain afterwards.
- Vigorously wipe off all excess stain from the wood, using smooth motions and actually working the stain into the wood for the perfect finish. I repeated this step and did two coats of the Golden Oak stain. As the wood dries, the color intensifies. I didn’t see the full color until the next day and it was deep and stunning.
- I then moved onto the beams. There really isn’t a good stopping place on a beam so I traveled across each side, going about 6 ft at a time and then circling back to wipe and smooth the color. I chose to apply the 2nd coat of the dark American Walnut stain thicker and wiped off minimally, almost as if I was paining rather than staining. This left a nice sheen and smoother appearance to the beams.
Forget the top coat!
- Because this product both stains & seals AND the ceiling is really never touched, I chose not to apply an additional top coat. The rich colors of the Stain & Seal™ with an ever so-slight sheen needed nothing else to complete the look. The ceilings were done & glorious as if they were brand new!
Thumbs-up for water-based stains
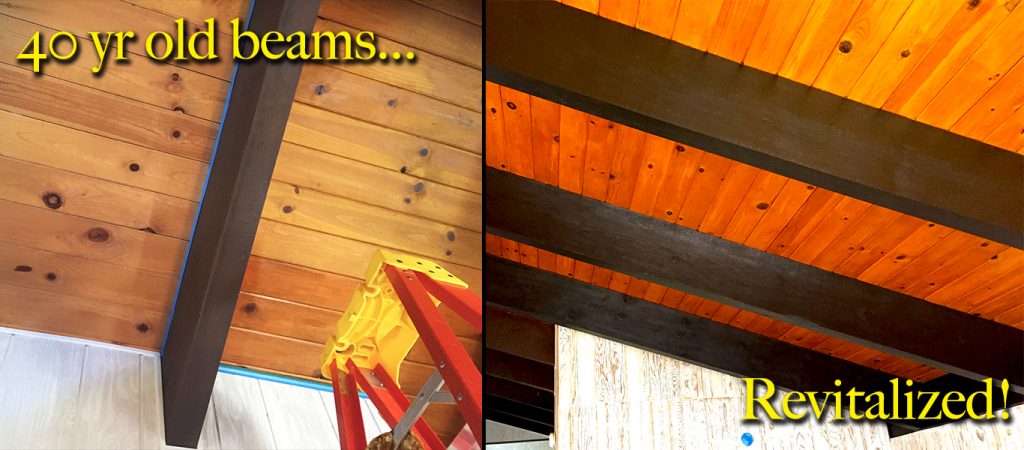
Revitalized wood ceilings with rich, deep colors
We’re nluv with products that are versatile and allow for creative freedom. Water-based stains are just that and rightfully hold studio shelf space of their own. Because they’re water-based, you have the option to treat them like paint for clean up & mixing and to use as a colorant in other paints and glazes.
Our ceilings have been revived back to their glory days and will shine with renewed color for years to come. Don’t be afraid of stains anymore or dread using them on your pieces. Give water-based stains a try and see what they can add to your designs. They may open up a whole new world of custom finishing for your portfolio.


One Comment