
‘Featured Finishes’ Series: Episode 12
The world of faux finishing allows for ultimate creativity but with that power comes many moments of frustration and impatience. A multi-layer finish can be difficult to visualize as its end product, but you must trust your design & artistic instincts. To help you along in your creative journey, here are 5 Tips for a Flawless Finish we always keep in mind as we create new finishes.
This week, let’s share… 5 Tips for a Flawless Finish
Tip #1 – Create a sample
Create samples to perfect your process!
Before you dive in on that perfect antique treasure, make a sample of the finish you plan to complete! Unless you have done that particular finish many times before and have all the intricacies of it mapped out, create a sample board first. If you don’t have enough time to create a sample, you already don’t have enough time to complete your project. A sample’s sole purpose is to perfect all your steps, products, tools needed and finishing touches for a flawless finish. It should be Step 1 in any project you embark upon! Another benefit to a sample is that you will now have a forever example to share with your clients and social media accounts for others to enjoy & learn from.
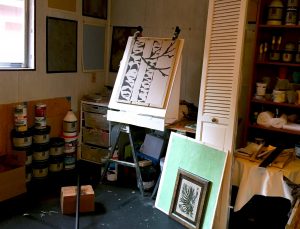
Tip #2 – Inventory all your supplies & tools
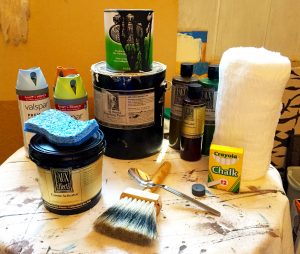
Start gathering all your tools & supplies and see what’s missing.
There’s nothing worse than starting a project and either running out of product mid-way through or be completely missing something! This is an unfortunate and unnecessary scenario. Map out on paper all the supplies, tools and products you’ll need for your project. If you made a sample, you would already know the list! Don’t assume you have enough product for your project either. Make an effort to accurately estimate the total amount of products needed to get you to the finish line – comfortably. If you have to order more product mid-step, you could delay finishing weeks or even ruin the finish by stopping at a non-repairable point.
Tip #3 – Don’t rush
2nd coat of glaze needs to dry overnight before sealing.
Impatience is a terrible quality to have as a faux finisher. Different layers and products need time to dry, cure and prepare themselves for the next step. If you properly and realistically plan out your projects, you will have built in all dry times, overnight steps, etc. to achieve your flawless finish. If a glaze needs to 6 hrs. to fully cure before stenciling, then plan on the 6 hrs. and go work on something else in the interim. It is very temping to rush through the ‘faux finish wait times’ but DON’T! You will only regret it in the end and your final product may drastically differ from your sample due to not following your own process. Ensure proper timing, client expectations on the finish and then follow your own advice!
Tip #4 – Use the right tool for the right task
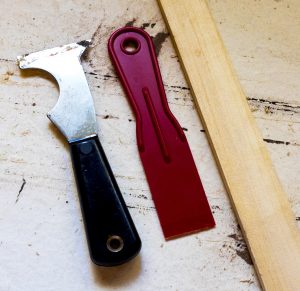
Metal, plastic and wood tools for scraping.
Each artistic tool has a purpose and for a good reason. A beautiful finish may never come to fruition if you don’t take the time to use the right tool for the right task. If you need a flexible Japanese trowel for your delicate Venetian plaster finish, don’t just grab a concrete heavy trowel because it is more convenient. If you need a tool you don’t have, either buy it and practice using it or pick a different finish! It’s as simple as that. Sometimes a chip brush will be perfect but at other times you may need a high quality badger brush to finish your glaze. There are lots of tools because they each fill a need. You can’t just buy every tool at once – that’s crazy! Perfect different finishes and fill your faux finish tool-belt over time. Each tool you add, even if as simple as cheesecloth or a scraper, will open up another door to your designs.
Tip #5 – Trust your artistic instincts & share

Experiment, create samples & share!
If you’ve done your homework and are methodical in your designing, you should know what you need, how much of it you’ll need and the steps to get you there. You may originally think twelve steps will get you the flawless finish you desire, but after working through your sample, you see things aren’t working out quite like that. That’s OK! This is all part of the artistic process. You know your products, color wheel and tool techniques. Trust your instincts and keep going with your finish. Eventually, your design will either shine or teach you something valuable and lead you in a new direction. Experimenting is hard work and I always feel that sharing is the best way to make me feel like my efforts were worth it. Don’t be afraid to share your successes as well as your failures. Learning from other artists is a great way to grow our artistic community regardless if it is things TO do or NOT to do!
2 Comments