
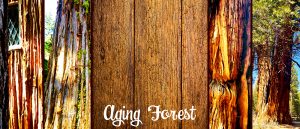
At the end of spring, I introduced the finish called Aging Forest through the ‘Featured Finishes’ series. We promised to detail the finish so you can enjoy it on something special too, so that’s what we’re focusing on this week. The main driver for this finish is to create the perfect indoor office for the outdoorsy minded-person. Nothing screams ‘inspired by nature’ quite like an outdoorsy design that celebrates Mother Nature. But first, you must unleash your crackle! If you haven’t done this in a while or maybe never, check out the article Know Your Crackle Direction. It’s chock-full of crackle insights and details to help in your creative journey whether the first time or just for a little refresher.
An outdoorsy design is born
Inspired by Tahoe’s towering giants!
I love the rustic nature of our house with the vaulted wood ceilings and overall Lake Tahoe cabin-feel. With lots of trail running and outdoor fun, the forest and mountain life are a great source of inspiration and exactly where this finish came from. It’s tough being inside when surrounded by so much natural beauty. The only way to do it and be productive is to create an outdoor feel inside your four walls! That’s what Lake Tahoe design is all about and the birth of our Aging Forest. Let the outdoorsy design begin!
Many homes in Tahoe have wood or hardboard walls which can be expensive to remove. Our house is all hardboard – no drywall in sight! But to us, that is the character of the home and we wouldn’t want to change it. So, what can you do with hardboard wood walls? How about surround yourself in an Aging Forest and kick things up a nature notch!
The Prep
The Aging Forest finish isn’t technically difficult but rather has lots of steps and time & patience between them. You will NOT finish this in a day, regardless of size of project. A small furniture piece or entire wall will still need to follow the same time requirements. My #1 piece of advice on this finish is ‘PLAN IT OUT!’. If you decide to do this in a room, be prepared to be there for a while – and I mean days, several of them! The majestic forest wasn’t created in a day and neither will your outdoorsy design. But DON’T be scared off by all the supplies and steps involved. This finish is worth every minute of effort when you stand back and admire the nature-inspired landscape you’ve created.
Tools & Supplies
-
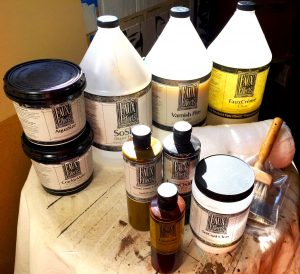
Gather up all your supplies & make sure nothing is missing.
Painting tarps & tape
- Screwdriver or paint multi-tool & stick stirrer
- Paint brushes & rollers
- Chip brush (for crackle medium)
- Roller pan
- Custom tinted dark brown stain-blocking primer
- Dark brown flat latex paint
- SetCoat® Clear
- AquaSize™
- CrackleMate™
- FauxCrème® Clear
- SoSlow™ (if needed)
- FauxCrème Color™(s)
- Varnish Plus™ in satin finish
- Empty paint mixing bucket
A blank canvas ready for a transformation!
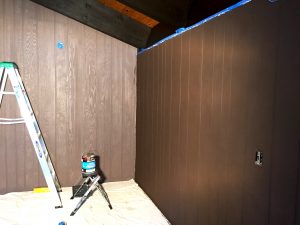
Now that all your supplies are accounted for, let’s get the room ready for some fun! I don’t usually clear out the entire room to paint, especially when there is no ceiling involved. This is the nluv Studio office so work must go on among the painting. We moved all the furniture about 4 ft. away from the walls receiving the Aging Forest treatment. We’re a little cramped in the center of the loft, but it’s fine for a few days.
Cover up any baseboards, ceiling lines and adjoining walls that you don’t want to accidentally hit with a roller or dripping paint. I like to use canvas drop clothes for the floor as opposed to plastic. It just feels safer and more sturdy a surface for ladders as well as I seem to stay neater with the canvas under my feet rather than plastic. Plastic just makes me messy!
The Technique
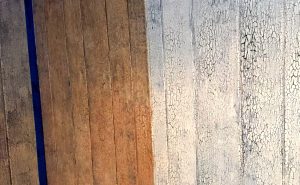
The walls started out with an old whitewash of some sort and held a medium shine. They were a blank canvas calling for new life and so the transformation began.
Day 1
- Wipe the walls down with a wet cloth to remove any dust or dirt. Let dry.
-

A tinted primer is key when painting dark colors.
Prime the walls with the dark brown custom tinted primer. I chose stain blocking just in case there was any residue from the hardboard and old paint that might leach through. The primer was tinted as dark as the paint shop could get it to make things easier for the dark brown paint layer. Only need one coat to get things started. Let dry.
- Paint 2 coats of dark brown latex paint on the walls. Use a thick good quality brush for all the wood panel grooves first and follow up with a roller for speed and coverage. Chip brushes are not for this step! No lap lines will show up if you do the grooves and edges first and follow behind with the roller. You will get a smooth brown layer as your base. Let dry between coats.
- The walls need to now be prepped for the crackle stage. Paint one coat of SetCoat® Clear on the walls and let dry overnight. This clear coat will create the perfect surface for the crackle medium to do its best work!
Day 2
-
The rich brown base color is ready for crackle!
Let’s crackle! Time to put on the AquaSize™. This product looks and feels just like rubber cement. Think of it as the glue that as it dries and cures, it will pull the top coat color of paint apart to make the crackle effect. I like to apply with a wide chip brush so I can better control the thickness and coverage (rather than a roller). The thickness of your AquaSize™ will dictate the size of your ‘rivers’. If you aren’t familiar with the ‘rivers’ and ‘islands’ of crackle, our tips & tricks may help you. Article: Know Your Crackle Direction. Let the AquaSize™ dry till its tacky to the touch. Hit the back of you knuckle against the wall to see if it is ready.
TIP: Watch your time on this step! make sure you can apply the AquaSize™ across the wall and get back to the beginning to start top coat painting before the wall is completely dry and no longer tacky to the touch. If the space is too big, consider doing this in sections or having a partner!
-
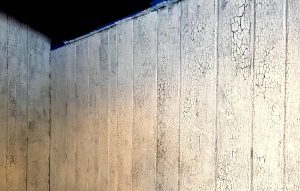
The magic of cracked walls! Watch the colors separate creating your ‘rivers’ & ‘islands’.
Mix cream color latex paint with CrackleMate™ in a 2:1 ratio. Continue mixing until it is smooth in consistency, just as the paint was before you added anything. The CrackleMate™ is thick and chunky but keep mixing until your paint is smooth once again. The CrackleMate™ will react with the AquaSize™ and create the beautiful Aging Forest effect. The thickness of this top coat will control the ‘islands’ in the crackle finish. Only one coat of top color needed! I first apply with a roller to get fast full coverage and went back across the wall with a paint brush to add more paint in certain areas for a varied thickness across the wall.
- Watch and wait. The crackle will start to spread across the wall right before your eyes. When the cream top coat is completely dry (and fully cracked), apply another coat of SetCoat® Clear on the walls and let dry overnight. This clear coat will get the walls ready for the next step… Glazing.
Day 3
-
Custom tint your glaze for the perfect shade.
Tint FauxCrème® Clear glazing medium with FauxCrème Color™(s) to create a brownish, tree bark custom color. If you live in a dry climate, consider adding 20% SoSlow™ to the mixture. This will increase the open time for the glaze so you have plenty of time to work with it before it dries. Don’t be afraid to make the glaze dark. Since the walls have a coat of SetCoat® Clear, they won’t absorb the glaze but rather allow you to move and manipulate the glaze across the wall for the perfect shade and depth.
- Brush on the glaze and blot off with cheesecloth. Finish the technique with a Badger brush and move the glaze into just the right places all across the walls for the perfect natural look. It’s amazing what a Badger brush can do with glaze! Let dry overnight.
Day 4
- Walls can take a beating so I am clear coating them for safety and durability. I originally decided to do a matte finish coat but when I created the sample board with it, the dull sheen ruined the striking look of the aged tree-trunk effect. Satin is the way to go in creating a low sheen that highlights the complexity of the finish. Again, mix in 20% SoSlow™ if you need more open time on the Varnish Plus™ to get all across the wall and not have any lap lines. One coat will do it! Let dry overnight.
Day 5
- Today’s the day to finish up any baseboard installation, electrical face plates and light fixtures. Decorate and enjoy what you have accomplished. Move all your furniture back where it belongs as you’re surrounded by your own custom Aging Forest! You’ve created the perfect indoor office with your outdoorsy design. Use natural colors, plants and other wood accents to complete your paradise!
Don’t limit yourself to walls
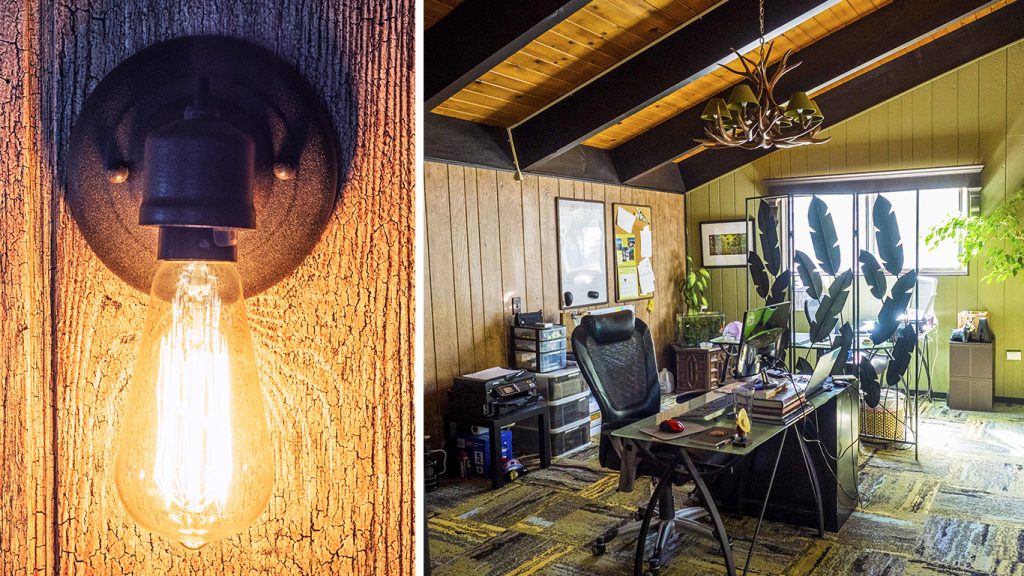
The Aging Forest look isn’t just for walls, commanding a grand scale. The aged crackle technique is amazing on old closet doors, furniture, frames, crates… You name it! The glaze gives you the control to age the look and adjust the ultimate shade. Get creative with your base and top coat colors. Don’t just stick to brown and white. Try other bright colors for a pop, sneaking through the ‘rivers’ or even go wild with the top coat for a kick of pizzazz. Crackle finishes are PERFECT for hard to paint items that perfection is tough to achieve. Since the crackle is imperfect in its own right, if you don’t perfectly paint every crook and nanny, no one will ever know! Enjoy your Aging Forest, however big or small!
What a beautiful result. Your creativity is inspiring.