Just because an item or supply is exactly named what you want doesn’t mean you have to use it! Get creative with your materials and unite unexpected ‘pairs’ for your custom designs. How about using wood molding as carpet transitions? Reuse, recycle, repurpose… let’s do it!
Wood molding as carpet transitions… interesting!
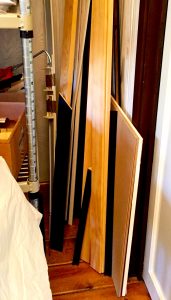
Various molding ready for any project
To get over the finish line and put those ‘finishing touches’ on your project, you sometimes need to think outside the ‘traditional-supplies’ box and put unexpected materials into the mix. Last week we talked about utilizing wood molding to repair and accentuate the design of a couch… ravaged by the adorable claws of our furry friends. While staining the wood for that project, we reminded ourselves that we have one last nagging piece of our nluv Studio carpet tile project to finish in the master bedroom. Isn’t there always that one little thing that needs to be done but you just don’t want to do it? Of course there is!
Looking through our pile of various wood molding, we got to thinking that perhaps we could use molding instead of the more expensive carpet transitions to finish the last corner of the master bedroom. You bet ‘cha we can and it’s actually a better design idea than the obvious carpet transition choice! For about $15, we will custom fit wood molding to serve as a carpet and seamless wall transition. Two purposes in one for a fraction of the price AND using existing materials already on hand. Now that’s a nluv Studio project!
The Versatility of Wood Molding
Carpet transitions are an important finishing touch, but that statement doesn’t mean you must buy actual carpet transitions to complete your project. Molding and trim comes in a wide array of styles and sizes making it quite versatile. Break free from the traditional thinking of only door casings and baseboards. Look at your projects with an open mind and choose a material that best fits your needs… which may not always be the obvious choice.
The Transition Dilemma
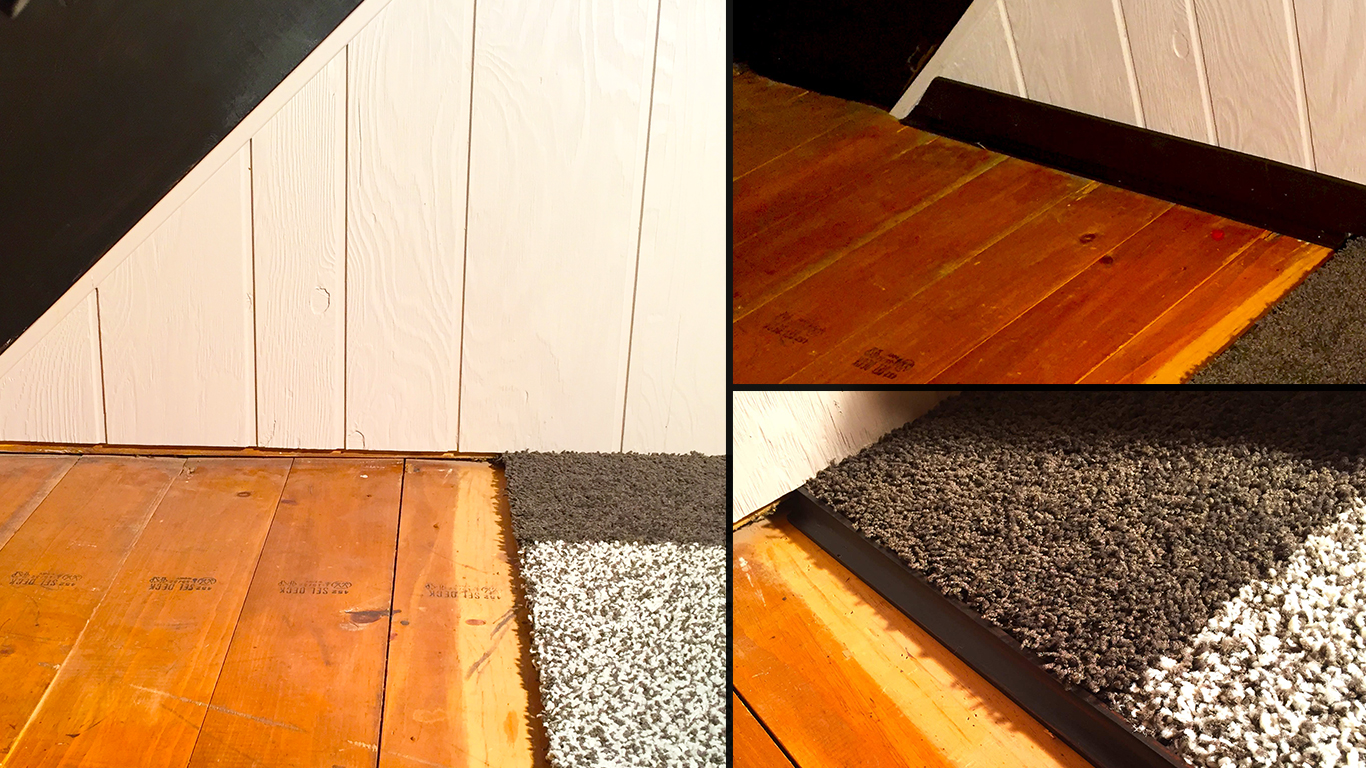
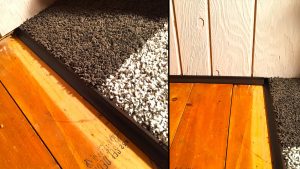
Unfinished edge w/ complex angles & heights
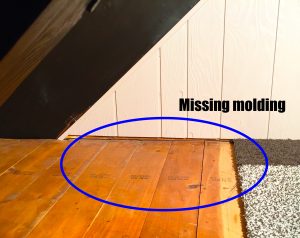
At the far corner of the master bedroom is a hard line end of the carpet tiles with a significant 1/2″ drop to tongue & groove flooring. It is a tough transition to design for and traditional carpet transitions aren’t the solution. Not just because of shape but also due to the ultimate length and cost to finishing this piece of the project. When we finished the office loft with baseboards and corner joints, we had some left over materials. When faced with any project design dilemma, I always head to the scrap pile first to see what I can find!
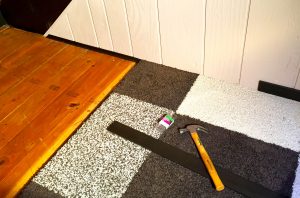
I gathered up all remnant pieces of molding and tried them out to see what they would look like at the master bedroom carpet edge. I couldn’t believe it! The inside-corner molding was the exact shape, width and height I needed for the carpet transition. I mean perfect! After my discovery, the only thing left to do was stain the molding and get it installed!
Tools & Supplies
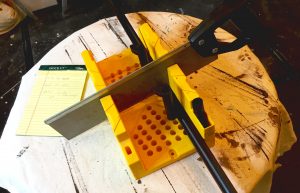
A simple miter box is perfect for small projects
- Molding
- Paint or stain
- Application brush
- Miter box
- Saw
- Sandpaper
- Measuring tape
- Finish nails or nail gun
- Wood putty
- Nail set (to countersink nails)
- Hammer
Step-by-step Instructions
The required finishing for the master bedroom will need two types of molding – inside-corner molding and baseboards.
Inside-corner molding is the perfect first layer
The first piece is the inside-corner molding, lining the carpet-to-wood transition as well as along the wall joining at the floor. Then as the second edge, the room baseboards will run along the top of the inside-corner molding to complete the baseboard line. No one will ever know that two sets of molding are present as the look will be a seamless addition to the room design.
- Measure the entire length of your project for a total required length of molding needed. Don’t forget to do this for all molding types you will be using.
- Stain or paint all molding (prior to cutting). Let fully dry.
- Starting with the inside-corner molding: To reduce cuts, install the longest edge first before you start cutting and fitting remnants. After installing the full molding strips, carefully measure and cut remaining pieces.
-
Final layer is baseboards at the top piece for a seamless look
On any cut molding piece, sand the edges and touch-up paint or stain. Let dry before installing.
- Due to the angle of the molding, I chose a hand nail gun, placing nails about 12″ apart. Install all pieces of molding.
- Move onto the second set of molding – the baseboards. Measure, cut, sand, touch-up and install all baseboards. Repeat the install steps until all molding is installed.
- Counter sink all the nail heads and fill with wood putty. Let dry.
- Touch up stain or paint where wood putty has dried.
Wrap it up!
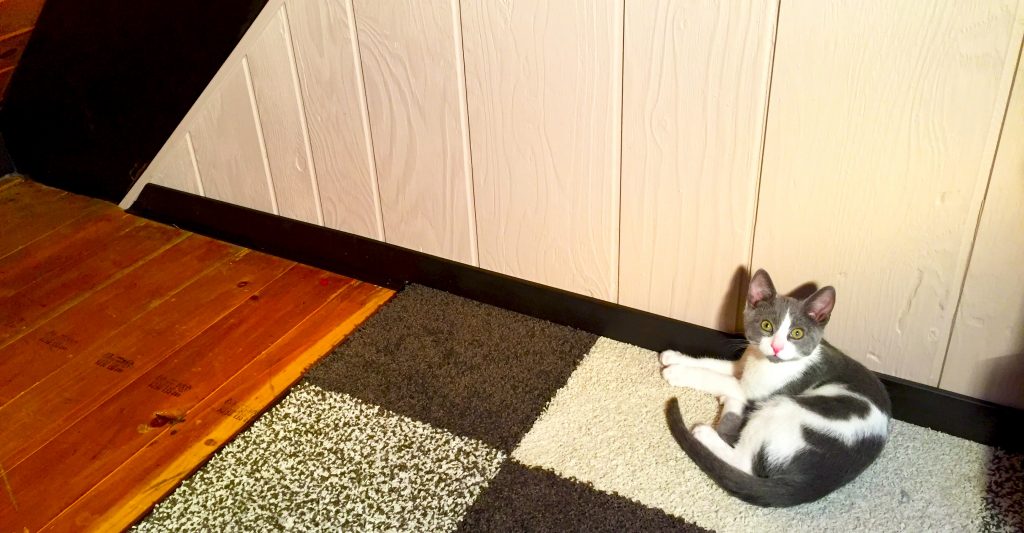
Completed custom wood molding that’s Gus approved!
Finishing the master bedroom floor transitions has sat on the project list for months. Is that a bad thing? Not necessarily. When you get stumped on how to complete a design, sit back and let it wait. Another project may be exactly what you need to spark the idea for the perfect solution. Repairing the couch last week combined with the left over pile of molding came together for the perfect finish to the master bedroom dilemma. Never feel locked in on materials to use for a project. Think first about your need and then hunt for the best materials & process to fulfill it. Wood molding isn’t my first thought when thinking about carpet transitions. But, for my specific need at the far corner of the master bedroom, it ended up being the perfect ‘unexpected pair’.