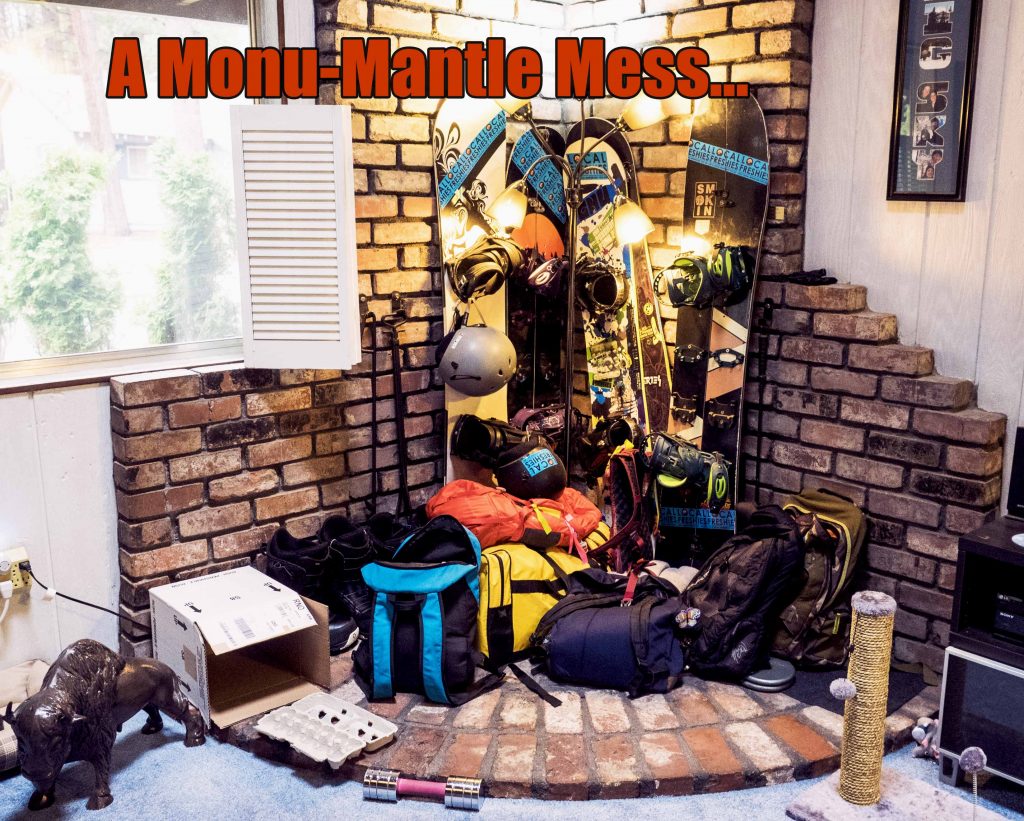
‘Organizational design’ may sound like an oxymoron but these two words should be best friends in your home! Our vision to organize our winter sporting-mess has finally come to fruition & the result is amazing. Five weeks ago we started with a mantel-mess disaster. And now, we have a feature wall that is functional, organized & a focal point for design. Bring on winter… we’re ready!
Organizational Design from Start 2 Finish
If you missed any of our journey, get caught up to see the full transformation (Part 1, Part 2, Part 3 & Part 4). We ended last week by custom painting the shelving hardware. The best part of the project is definitely this week, not because we’re finished, but it’s where the organizational elements get mounted and gear placed in its forever home. Before we dive into shelving & the gear though, let’s take a quick review from start to finish for a full project scope that you can build your own design plan from.
Part 1: Pick your space & choose design materials
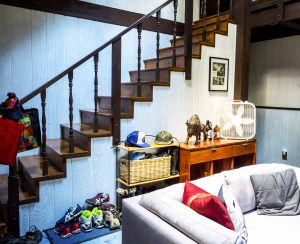
The perfect underutilized wall for a transformation!
Look around your space and find an open wall, tall enough for your longest equipment. If needed, paint the wall a neutral color as the feature itself will be full of color and shouldn’t clash with the wall it sits against. To create a feeling of the mountain life and a rustic exterior, fence boards will be the main snowboard wall feature material. Measure the length & height of the wall to calculate the # of fence boards needed. To create dimension, the boards will be staggered in heights across the wall for a rustic feel. Cut all the boards to length and any notches that are needed to fit across the wall. Lightly sand each board and ‘seal’ the grain of the wood with a base paint coat.
Part 2: Build a strong wall & paint your fence
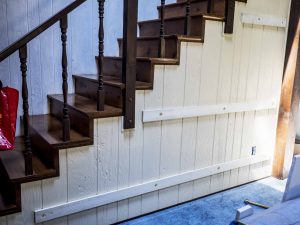
Three strips will secure our feature wall.
With all the fence boards, shelves and gear, our feature wall will get heavy so mounting strips are a must! Space out the mounting strips to provide maximum support. Measure out all strip lengths needed, careful to NOT make them too long so they stick out or are visible after the fence boards are mounted. Screw each mounting strip to the wall to hold it in place using anchors. Make sure they’re level!
Plan the color layout for the wall before painting begins. Each board will get a total of two coats of paint for each color used. Each first coat is a little thicker to get a solid full coverage layer to start things off. For the second coat, I will use the brush dipped into the water and then paint to ensure a smooth final coat & that all the nooks and crannies are filled in.
Part 3: Distressed elements
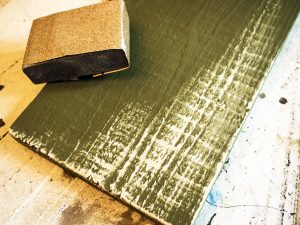
Distress to your design desire.
Distressing wood is a personal and unique process. No two boards will ever look alike. There are two main methods of distressing – heavy or gently used. My design warrants a heavy distressing wood look, so I will use 80 grit sandpaper for the entire process. Start with the edges and sides. Use the sanding block and scuff in the direction of the wood, carefully wearing off the color as you desire. Move onto the center of the fence boards. Take the sanding block and use a circular motion to rough up color on the faces of the boards. Finish this step off by sanding with the grain to smooth out the marks and create a more natural worn effect.
With all the fence boards distressed and wiped down clean of dust, it’s waxing time! Since this Snowboard Feature Wall will get wet, banged, abused and roughed up, I am applying two full clear wax coats and a dark wax antique layer to finish off the look. Start with the clear wax. Brush on the clear wax with smooth strokes with the grain of the wood. Less is more here! Wipe off any excess spots if the wax is a little thick anywhere. Apply a second coat of clear wax to EVERY board. The third and final coat of wax is the dark brown wax to add some ‘age’ to the look. Wait 24 hrs and then buff with a plastic bag for a little more sheen.
Part 4: Installation & hardware
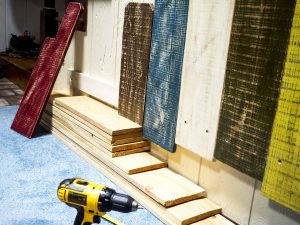
Use remnant wood to help hold fence boards at the right height for mounting.
The staircase wall has a cool shape in itself as it ‘steps’ down with wood accents from landing to landing. It is the perfect line to follow in the fence board install. But, don’t just mimic the steps… that’s boring. After sketching out the fence board ‘skyline’, lay out all the boards across the wall to ensure the heights vary & notches fit with no adjustments needed. Mark a minimum of 4 screws for each board, securing the top & bottom for a snug hold. Make sure your marks line up on the mounting strips!
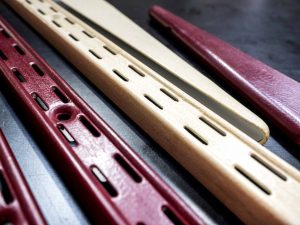
Decide how much shelving hardware you need. Measure out where the shelf mounting strips will go to determine the board colors to match. To help with paint adhesion, I use my favorite product PrimEtch to create ‘grip’ on the metal surface for max paint adhesion. Paint a thin smooth coat of PrimEtch and let dry at least 4 hrs. Paint two coats of the same red and white paint used on the fence boards. Apply 2 coats of clear wax with wax brush, letting dry between coats ~ 30 min. To match to the fence boards, a little dark wax rubbed onto the metal hardware will help finish the disguise for that perfect finish! Let waxed hardware sit for 24 hrs before buffing.
The final step – Add organization & load up your gear
We reached the final stretch! The last piece to the puzzle is all about the organizational elements. Mounting the shelving hardware, building our shelves, cutting our board pegs and loading in the gear is all that’s left. Time to unleash your inner ‘organizer’.
Shelving
We have a lot of gear so the shelving component of the design must be strong and hold up for the long haul. The shelving hardware is mounted on the decorative fence boards but secured into the mounting strips that sit behind the scenes. This will give the feature wall its needed strength to hold bins full of gear.
Tools & Supplies
-
Custom painted shelving hardware to match feature wall design.
Drill & drill bits
- #7 2″ wood mounting screws
- Remnant fence boards cut to size + extra wood strips
- Level
- Tape measure & marker
- Saw
- Sandpaper
- Stain & top coat
- Paint brush & rags
- Clamps
- Nail gun/compressor
- Additional screws for securing shelves
Shelf build and mounting
-
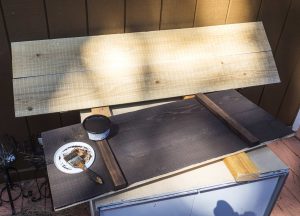
Remnant fence boards turned into shelves. Secure with strips for strength.
Take the three custom painted shelving strips & mount on the associated red and white fence boards. Be careful to use the mounting strips behind the display as its anchor points.
- With the shelving hardware in place, let’s build some shelves. We are using the left over fence boards.
- Our shelves need to be at least 14″ wide, so two fence boards will create the perfect size shelf.
- Cut fence board remnants to length, sanding edges & faces for a smooth finish.
- Cut wood shelf securing strips the width of the shelf to hold the boards together as a single piece.
- Nail gun the wood securing strips to the underside of the shelf to create a solid shelf design.
- Stain the shelves (1 coat American Walnut) and seal with flat clear coat for added durability.
- Secure shelves to the wall hardware using appropriate length screw for a strong hold.
Bins & pegs
Our design calls for bins to hold gear on the shelves while wall mounted pegs will hold the snowboards upright. We chose to mix ‘n match our bins for a more rustic look. And as for the pegs, we need four 3/4″ pegs for a secure ‘post’ to hold up our snowboards.
Tools & Supplies
- 3/4″ dowels (cut to length for pegs)
- Saw
- Foresters bit
- Drill
- Glue
- Stain & rag
- Sandpaper
Bins & peg instructions
- If your bins are finished as-is, then there is no work to do here. We have two unfinished bins that need to be stained. Stain/paint any bins for the display.
-
Dowel made into snowboard peg.
Decide how to organize your gear and fill up those bins. Place them on the shelves.
- Get a partner and stand up all the boards to decide the direction and spacing needed.
- Once you determine the length and placement of the board pegs, drill holes the size of the dowel using a Foresters bit.
- Cut and stain/paint pegs (dowel pieces) before mounting into wall.
- Gently twist or hammer in the pegs to the wall. Apply a little glue into the hole for added strength.
- Consider other hooks on the wall for helmets, gloves, goggles, etc. We hung up hooks for helmets and gloves to maximize wall space and free up more bins for gear.
Gear time!
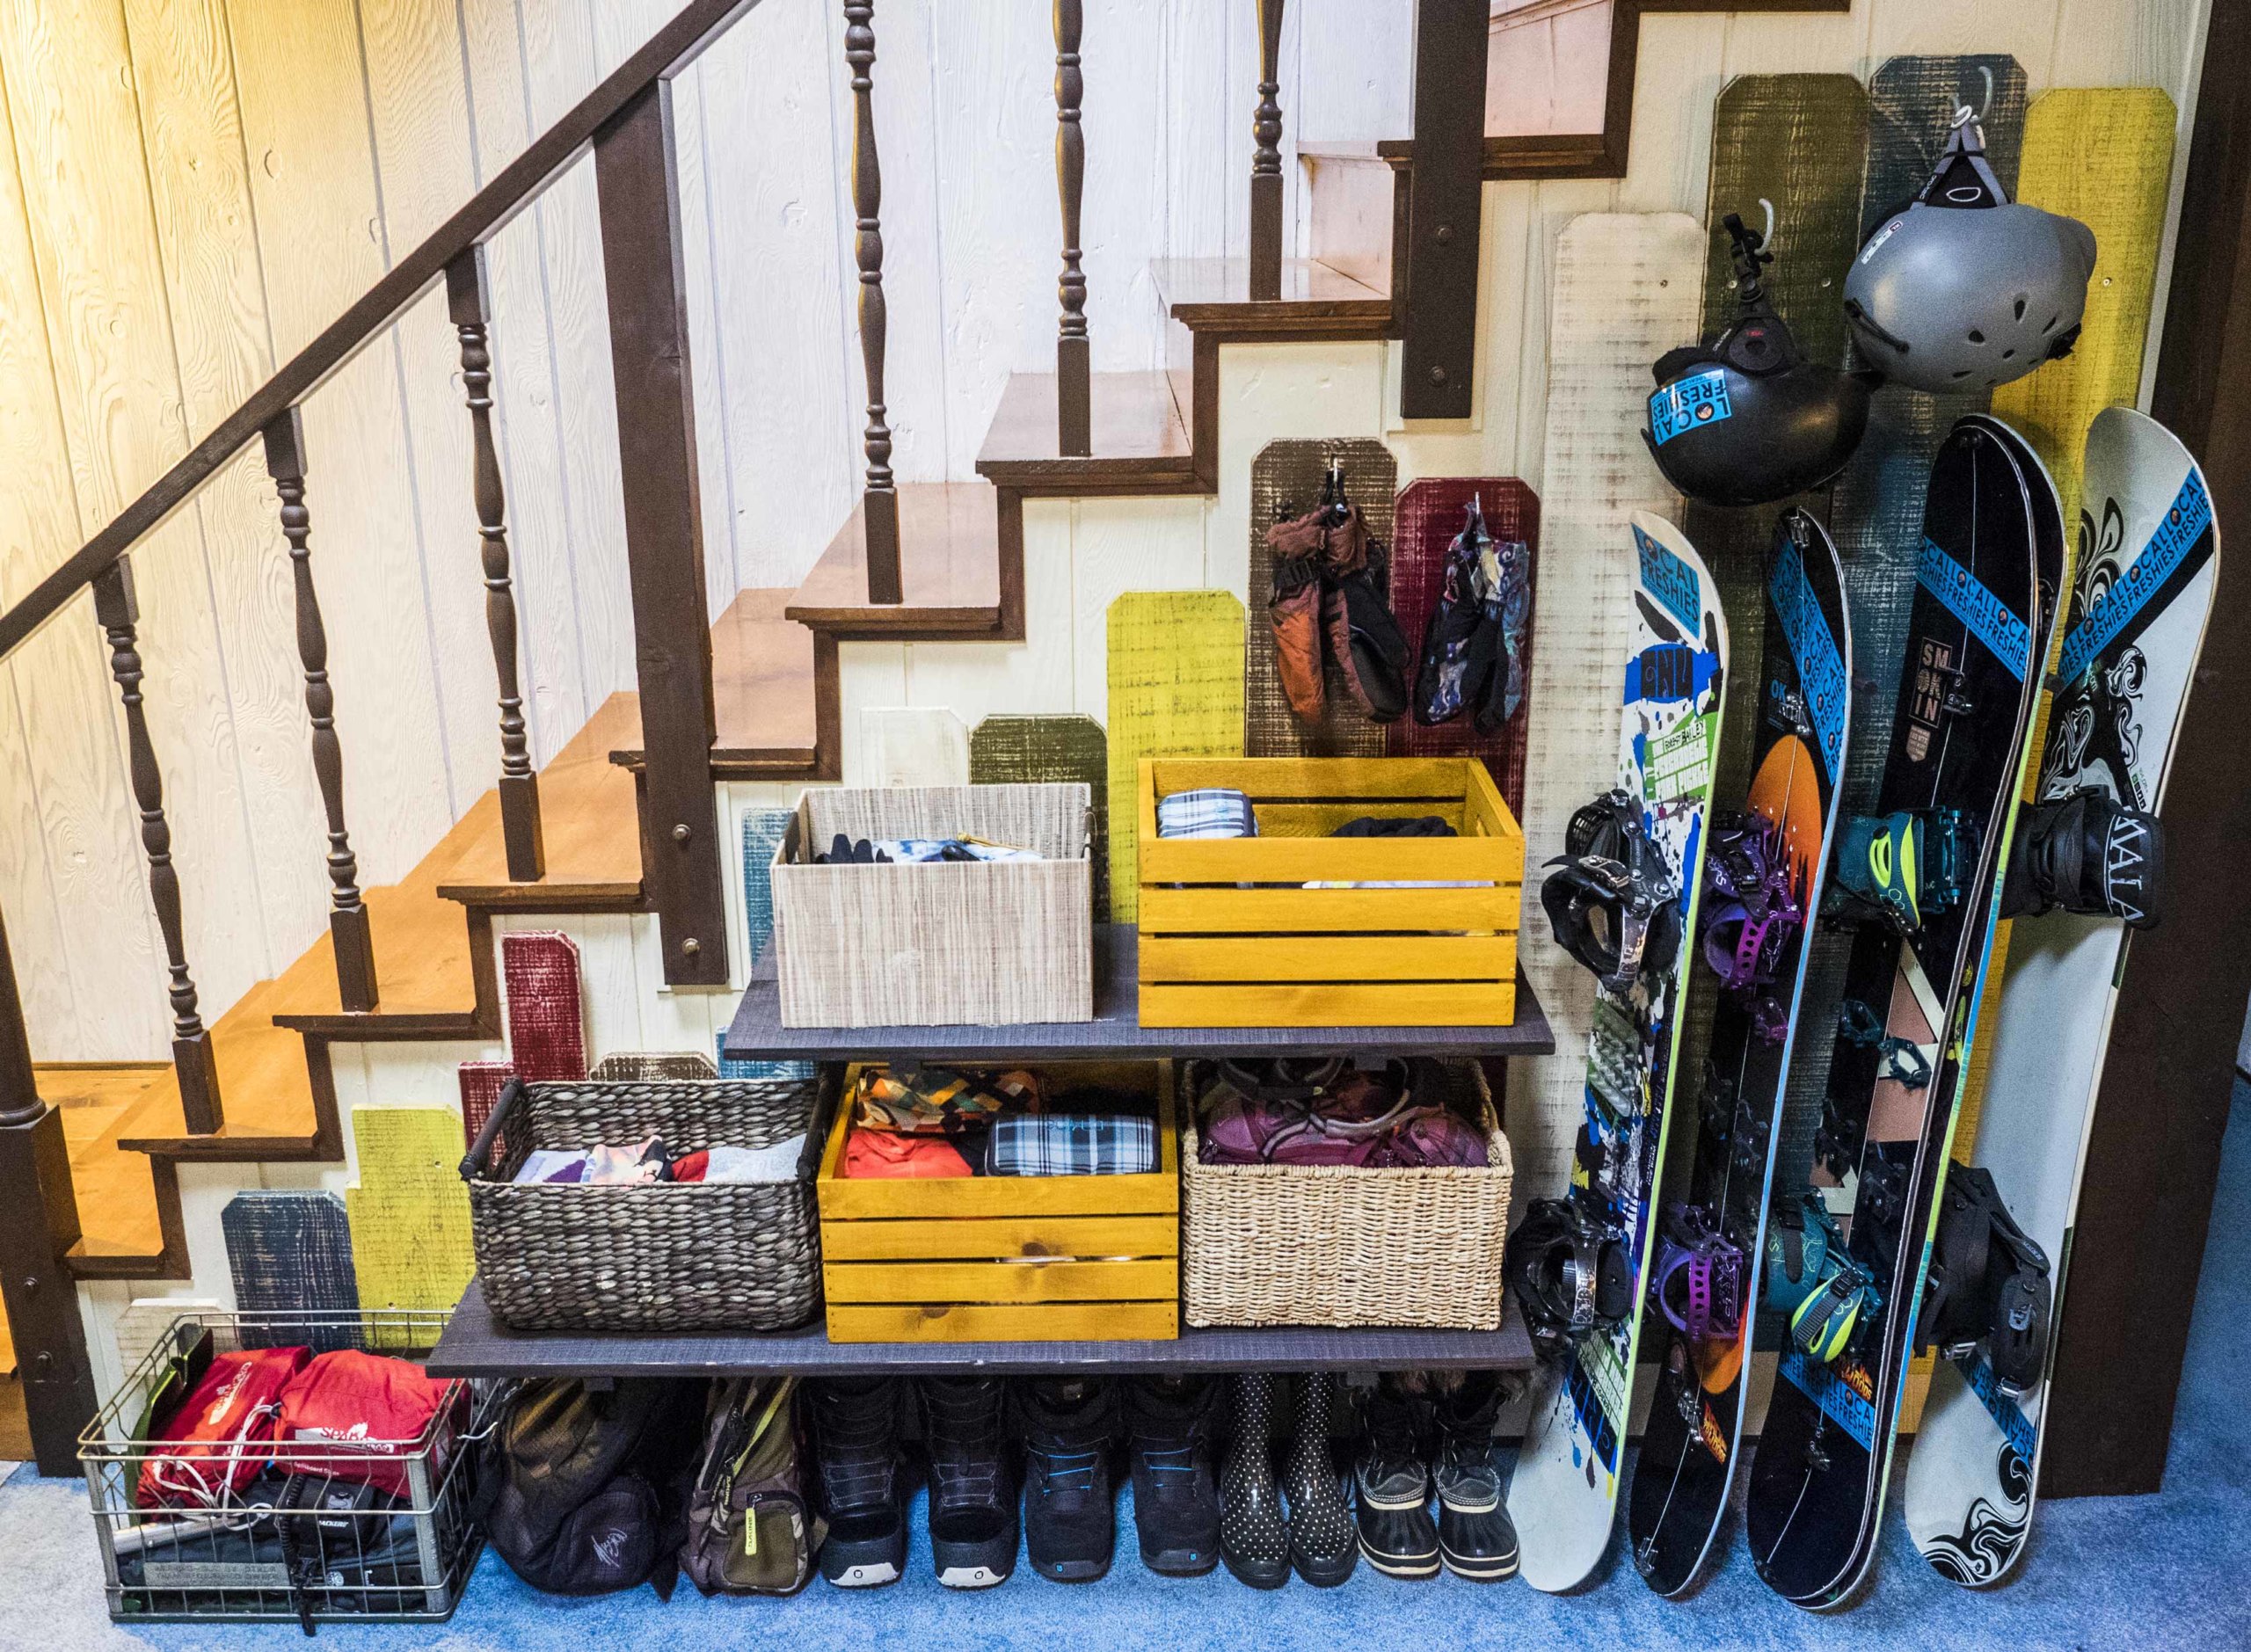
We did it! Load in the gear and enjoy the organizational design of sporting glory! Boots, backcountry gear and backpacks line the floor. Boards stand tall on the far right while our shelves and bins round out the feature. If you see any empty spaces on the wall, hang up items that make more sense up on the wall rather than in a bin. Since we still have some time before the snow, we will figure out the right floor runner to catch all our snow, mud & mess before it arrives!
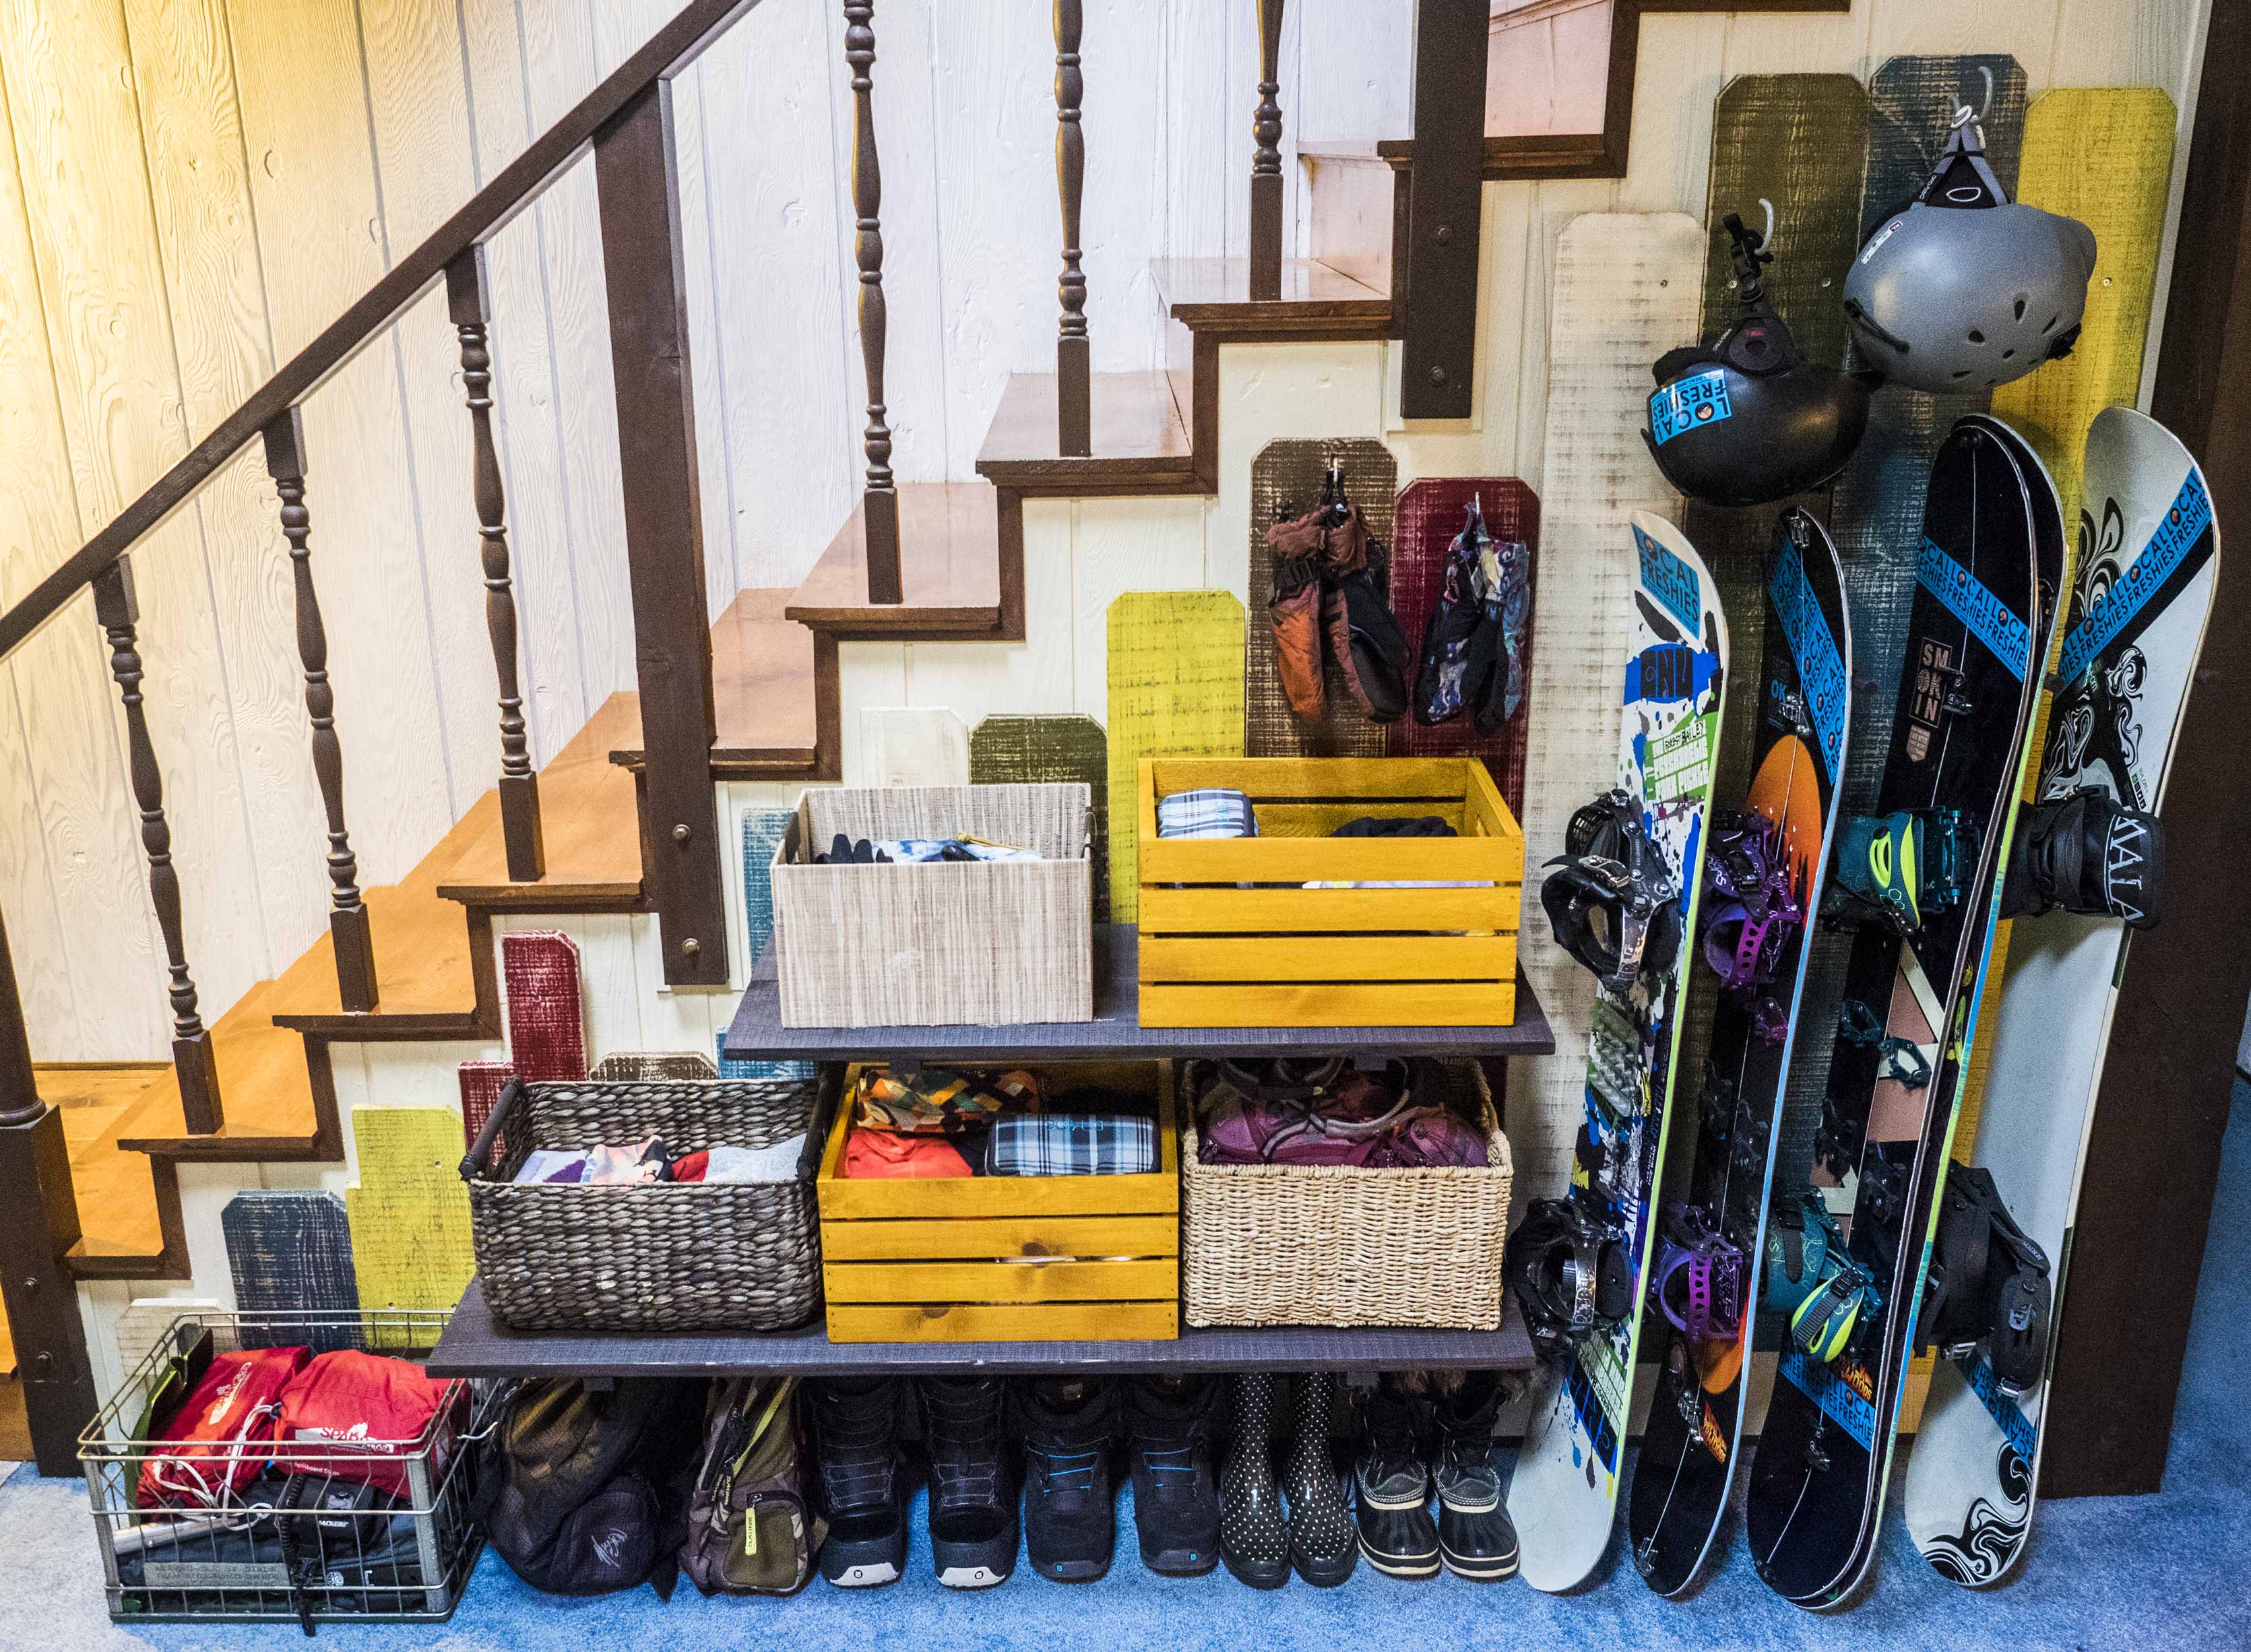
Completed snowboard feature wall!
Fit a lifestyle into your design
Living in the mountains, an outdoor lifestyle is the theme of everything we do. Playing outside but living inside can make your home feel like a sporting goods store disaster. When designing your space, consider your lifestyle and make them work together. Our snowboard gear gets used about 8 months out of the year so it’s ‘out’ more than it’s ‘away’. Our snowboard feature wall allows us to house all our gear in an organized, functional way while being a focal point in our home… embracing that we love the outdoors. Fit your lifestyle into a design that works for you!
3 Comments