Isn’t this the easy part? You go to the local flooring store or shop online, see something you like that’s a great price and you buy it. What else could there be in choosing the right floor? Well, this could NOT be farther from the truth when you are doing the job yourself unless budget is of no concern. There is much more to flooring than picking what you see!
An eye-opening adventure
Before we can start painting, buying new blinds or anything else on the list for that matter, the flooring needs to be picked. Choosing the right floor will set the whole renovation in motion and tell us the direction to go for colors, textures and finishes. We don’t have a big budget so it’s important to know what it will ALL cost.
Choosing the right floor
We’ve done a lot of research on flooring and I don’t mean just looking around on Pinterest or watching HGTV. Reading books, finding published articles, searching company’s blogs and actually talking with professionals has given us a sold foundation to start from. We are happy with what we’ve learned so far and are ready to get busy. But, now it’s up to us in choosing the right floor for our ‘life situation’.
More than meets the eye…
What you don’t see counts too!
A majority of DIY home renovation projects go over budget for one reason or another. During our flooring journey, I can see how this part of a renovation could be a big problem for budgeting if you only consider the cost of the flooring component itself.
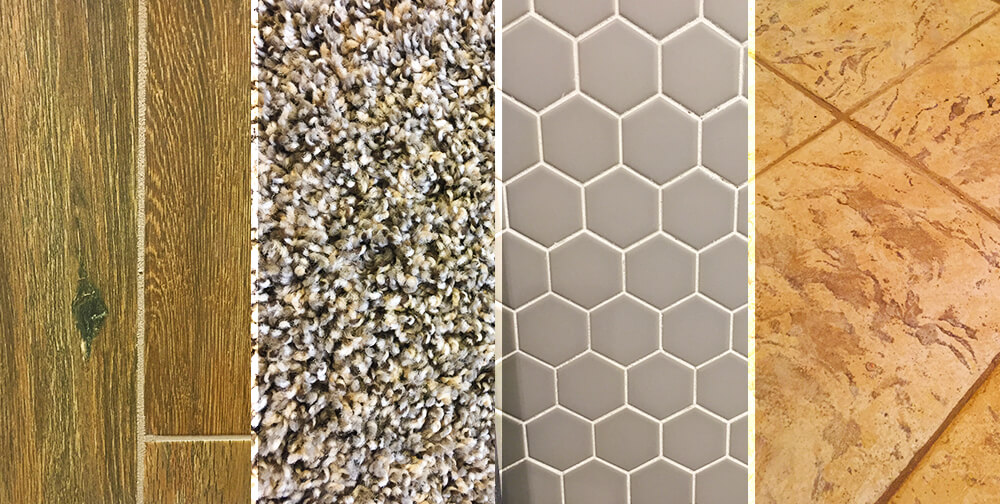
There are lots of choices in flooring. You have carpet, tile, solid hardwood, engineered hardwood, reclaimed wood, vinyl, laminate or even plywood itself. Sheesh! Narrowing down this list has a lot to do with overall budget and usage. If you are tight on funds, odds are you aren’t going with solid hardwood so you can cross that off the list. Also, if you have concerns on durability or water-resistance, that will help cross off a few too.
For us, a few choices were simple. In the bedrooms, we will do carpet and in the baths we will do a simple mosaic tile. But those rooms aren’t what we’re writing about. It’s the main living spaces and for us, that comes down to either all wood plank tile or new carpet w/ stenciling existing porcelain tile. We need a very durable flooring option that will stand the test of time and anything life throws at it. Oh, and not to mention we have a lot of area to cover – 1,350 sq. ft. of it (excluding bedrooms & baths)! This amount of flooring makes the budget and really knowing what ALL the components of installing a floor very important! So the question is… “How much time & money can we spend on the flooring?”
What’s underneath counts
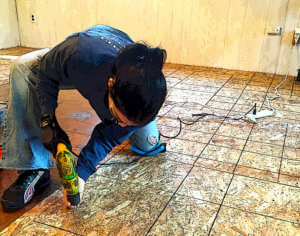
This actually means two things. First, you have to tear up that old floor and see what’s under there. You’ll be greeted with either a wood-type subfloor or concrete. They both have their pros and cons to flooring, but knowing what you’re up against is the first hurdle. Secondly, the tile isn’t just slapping it on top of either option. A proper underlayment will be the key to a long lasting tile surface. The carpet route doesn’t really care about the sub-surface except if you wanted a little more padding installed on the concrete vs. the wood.
We haven’t actually torn up the old floor yet so we don’t know what lurks below. But to combat not knowing, we’ve worked out a solution for both scenarios because you never know when you’ll run into either. Now we’ll at least know how to handle both.
The budget
Our overall flooring budget is $7,000 which isn’t much since we are replacing about 1,900 sq. ft. of surface area! The bedroom carpet and bathroom tile will take a $2,000 bite out of the budget, leaving us with about $5,000 for the other 1,350 sq. ft. (including a 10% buffer) of tile or additional carpet to install. We already have a great local carpet store that can complete the additional carpeted area (with zero labor for us to contend with) for $3,000. So that means if we stuck to all carpet and mosaic tile in the baths, our total budget would come in at $5,000 w/ labor only needed on bath tile. Not too shabby!
So, we now know the carpet/bathroom tile option meets our budget with minimal labor time. Now on to the tile. The tile underlayment preparation will be a static cost so once we know how much that will be, we can determine what price range we can look at for the actual tile. There are multitudes of tile choices but only so many options for what to put under the tile.
Step 1: The Tile Base Layer
Once we pull away the old carpet, the mystery will be solved. Will we see a wood subfloor or a concrete slab? Either way, we will be prepared.
The Concrete
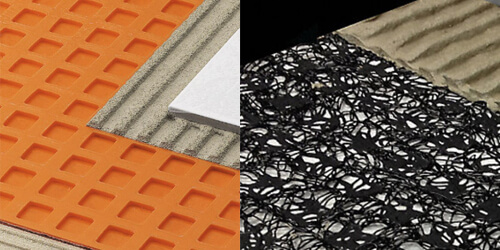
Underlayment options for concrete
A concrete slab will require some work before laying down the tile. Some people choose to tile right over concrete but I am not one of those people. My goal is to do my best to prevent future cracks and other tile issues by taking extra time and some budget to install a proper underlayment layer.
Our goal is for this floor to last a long time so we need to properly account for moisture and cracks. A great way to combat this is to lay down an uncoupling membrane like Schluter Ditra. This will act as a moisture barrier and help combat cracks & movement in the concrete so your tile doesn’t immediately take on the cracks and need repairs. Think of it like a little forgiveness to take on the stress of cracks without disturbing your tile. And don’t forget about helping to keep moisture at bay.
Unfortunately, this isn’t cheap and could run you $1.30+/ sq. ft. And it doesn’t stick itself to concrete either. You’ll need something like thinset mortar to affix your membrane to the slab. You can usually get a 50 lb. bag for about $17 and this should stretch out to about 100 sq. ft. So for our floor, this step would cost about $1,900 in just materials. This is quite a bit of labor to consider as well!
The Wood Subfloor
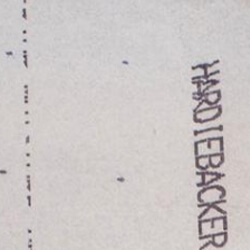
Cement backerboard
In all honesty, things aren’t much different if wood is present vs. concrete. To give the tile a sturdy surface to bond to, we will need to put down a layer of cement board like Hardibacker on top of the wood subfloor. We don’t have the same moisture concerns as we do with concrete, so this is more about a solid surface to hold the tile for the long haul. Again, some renovation pros will tell you it’s fine to just tile straight over plywood but again, we aren’t from that camp. We are putting a lot of time and effort into this new floor and plan on giving it the best chance for long term survival.
Cement board is a little cheaper than the uncoupling membrane but it still needs to be adhered to the subfloor with mortar and nails. It is actually a little more work as you have to cut the boards to size, mortar in place, then once down, follow by taping the seams & nailing. So, while the materials may cost less, more time will be needed to complete the work. For our floor, this step would cost about $1,500 in materials. And again, we must consider the labor time.
Step 2: The visible flooring
Once the underlayment is determined, the visible tile costs will be equal. There’s a few more things to consider before we know how much we can actually spend on the tiles themselves. We will need another layer of mortar to adhere the tiles, a few special tiling tools (like trowels, sponges and spacers) and of course the grout to finish it all off.
Most people probably don’t think about these ‘ingredients’ to tiling, but when you are doing the job yourself, every item on the list counts! For our job, we priced out the mortar, grout, tools, nails and tape to around $700. Once you know your square footage, just go to your local home improvement store and look at prices and coverage and you too can come up with a realistic number.
Step 3: The math
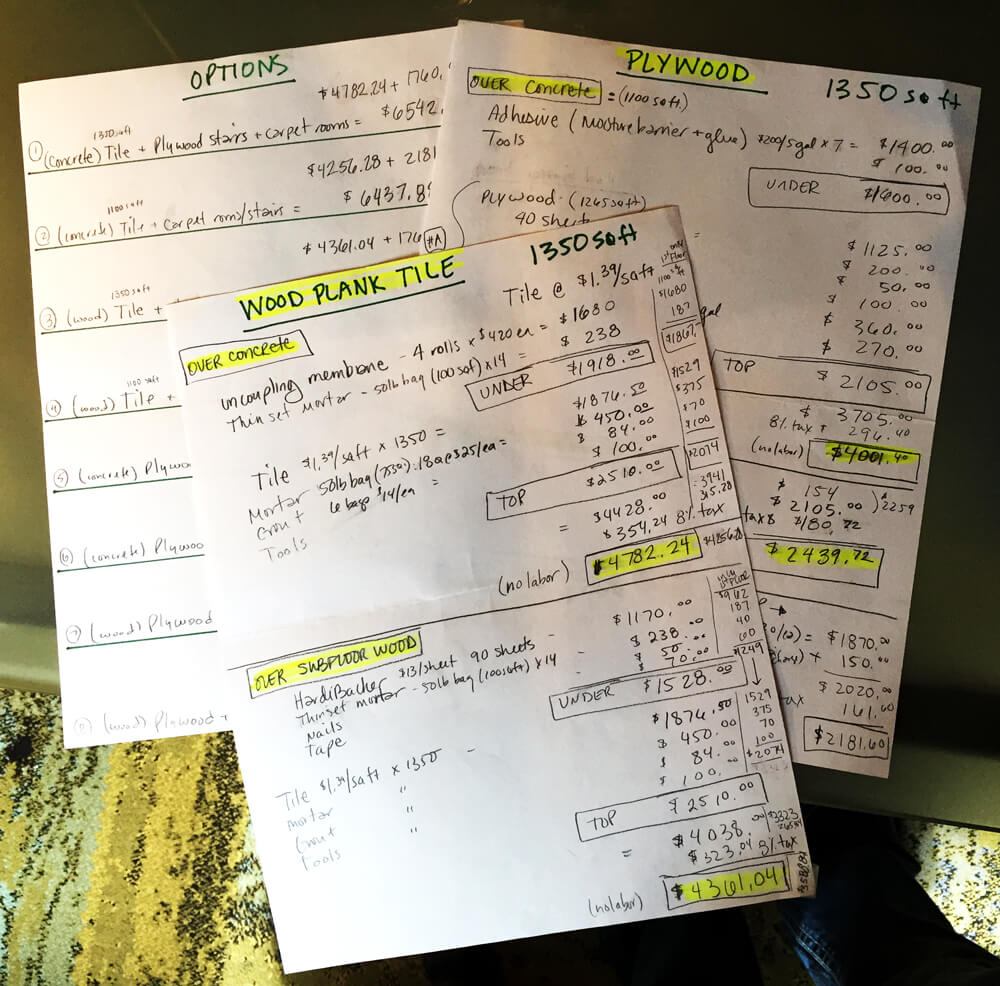
Let’s do the math, without thinking about labor right now. Our tile underlayment cost for concrete is $1,900 and wood is $1,500. The additional tiling materials themselves came in at $700. The last consideration is overall tax. We are using 8% so if the total budget is $5,000, we need to hold out $400 for tax. This leaves us with a grand total of $4,600 to spend on the tile job itself. With the concrete total as $2,600 and the wood coming in at $2,200, this means we can spend up to $1.48/sq. ft. for a concrete subfloor vs. $1.78/sq. ft. for a wood subfloor. If you have done any wood plank tile shopping, these are tough numbers to find. Most tile we have seen is in the $2+/sq. ft. category, going all the way up to $7/sq. ft. Bargain shopping here we come!
Even if we do find wood plank tiles that meet our budget, these figures have no consideration for labor. We may be doing the work ourselves, but even our time is money since we won’t be in the studio working while we are renovating. Our estimate is that this large tile job, factoring in removing existing flooring and install/dry times, a solid 4 weeks of labor hours will be spent. That’s a lot of time we cannot discount as $0.
The final decision
We may have two viable budget options between carpet throughout or new wood plank tiles, but until we determine what subfloor we have, find a tile that meets the budget and consider the labor involved, we are far from making a decision. Time is ticking so this week we will know the direction we’re headed. Stay tuned as we start demo and checking off design decisions on our master renovation plan.